Are you struggling to create blog content consistently?
You're not alone! But what if I told you there's a way to automate a lot of the writing process without compromising content quality?
Sounds too good to be true, right?
In this blog post, I'll teach you the exact same process I use for writing blog posts that rank.
This isn't just theory – it's a proven, step-by-step process that combines the power of AI with solid SEO principles to help you create content that drives traffic and engagement.
Ready to speed up your content production?
Let's dive in.
More...
Set up your Claude project
Quick note: Projects are only available with Professional and Team plans, so upgrade to access this feature.
Think of a project as your personal knowledge base that Claude can reference when creating content.
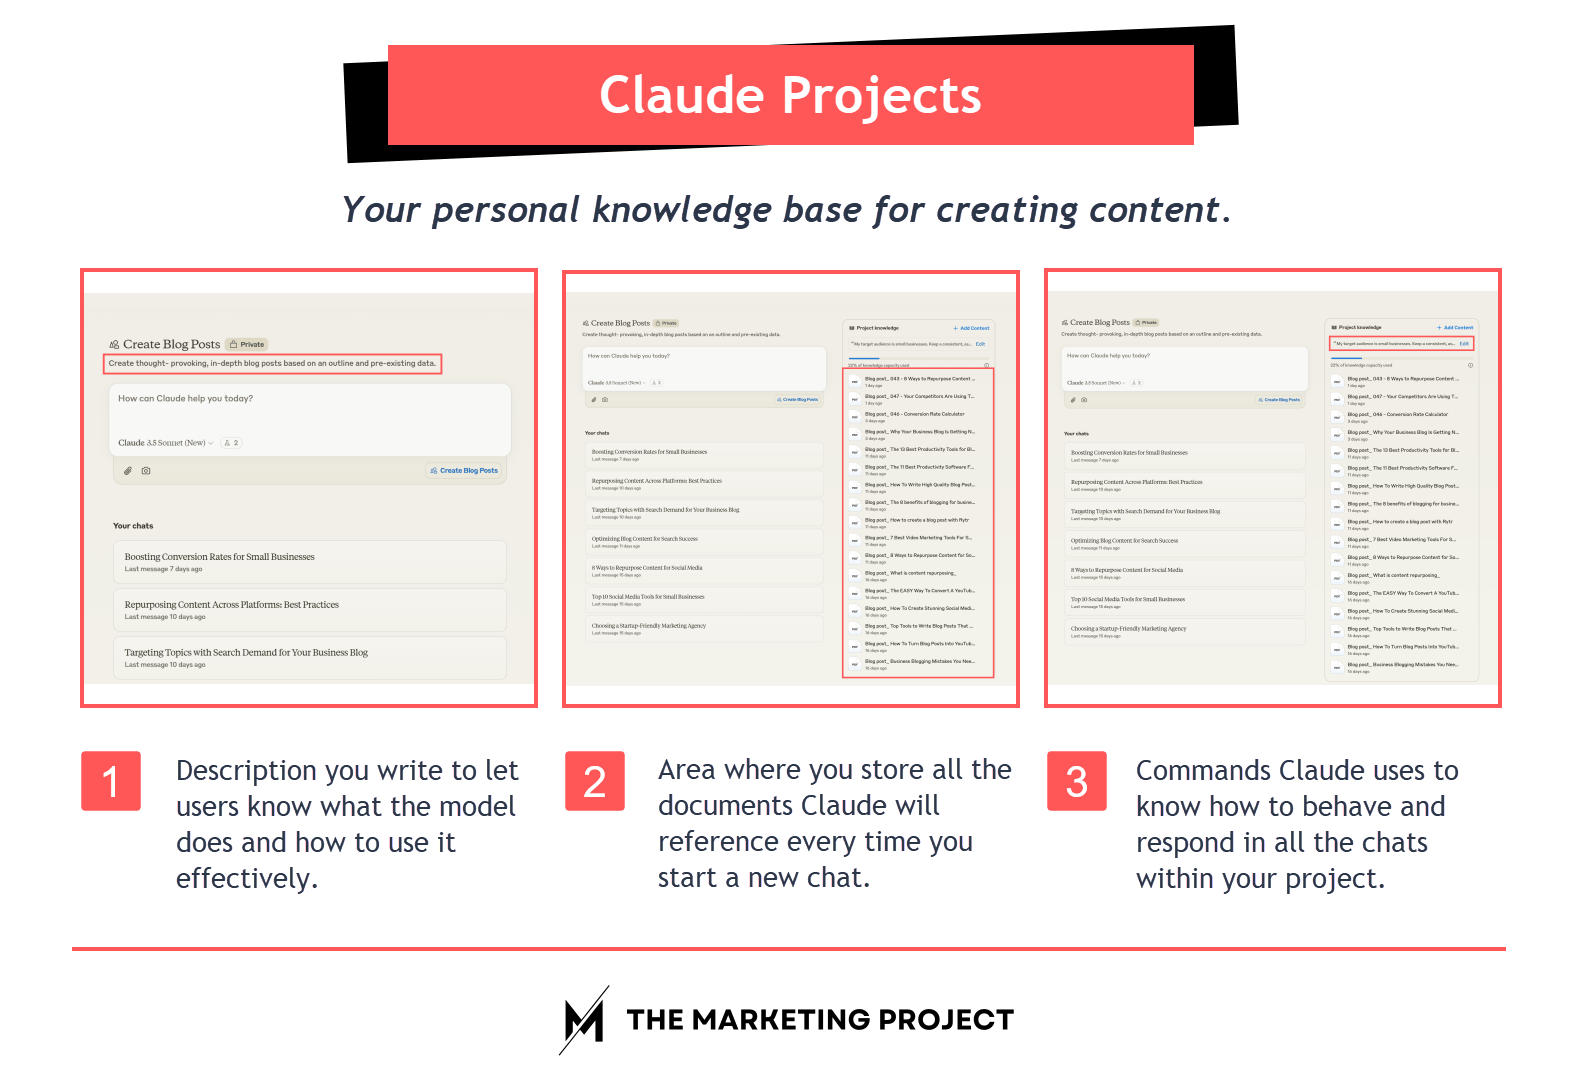
There are three main sections you need to set up:
1. General project description - This is a brief overview you write to explain the project’s purpose and how to use it effectively.
2. Project Knowledge - Here, you store all the documents Claude will reference each time you start a new chat. This section is essential because it helps Claude understand your preferred tones, examples you’ve provided, and the structure you want in your content.
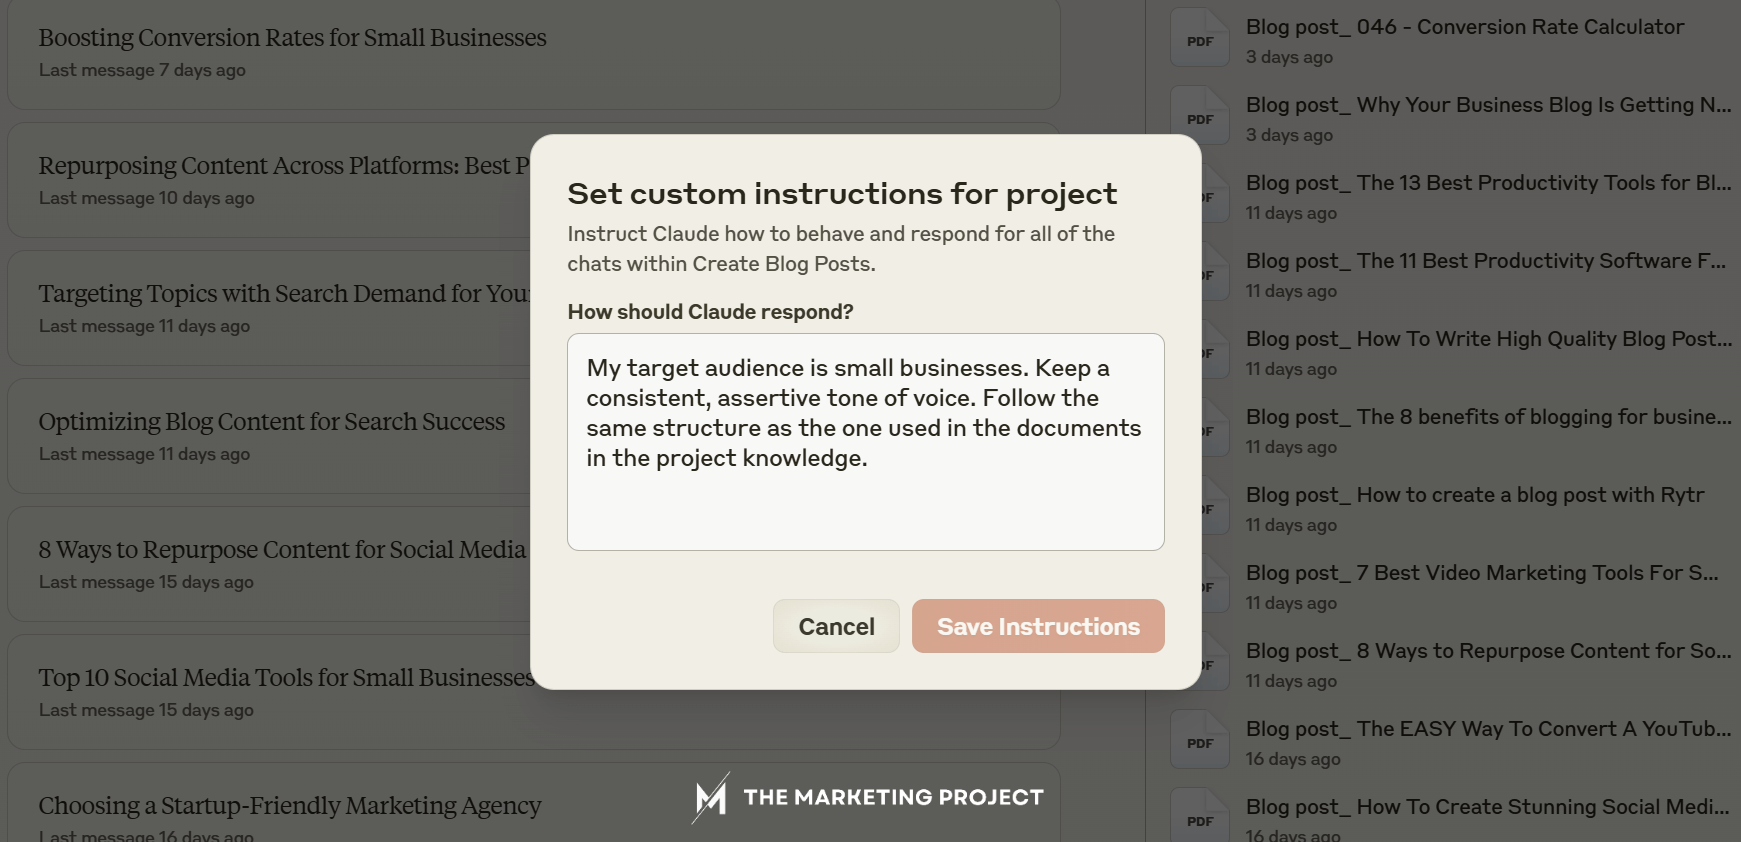
3. Custom instructions - These are specific commands Claude will use to know how to behave and respond in all project chats. They save you time by preventing the need to repeat instructions. For example, you can specify your target audience, preferred tone of voice, and any specific prompts you want Claude to follow.
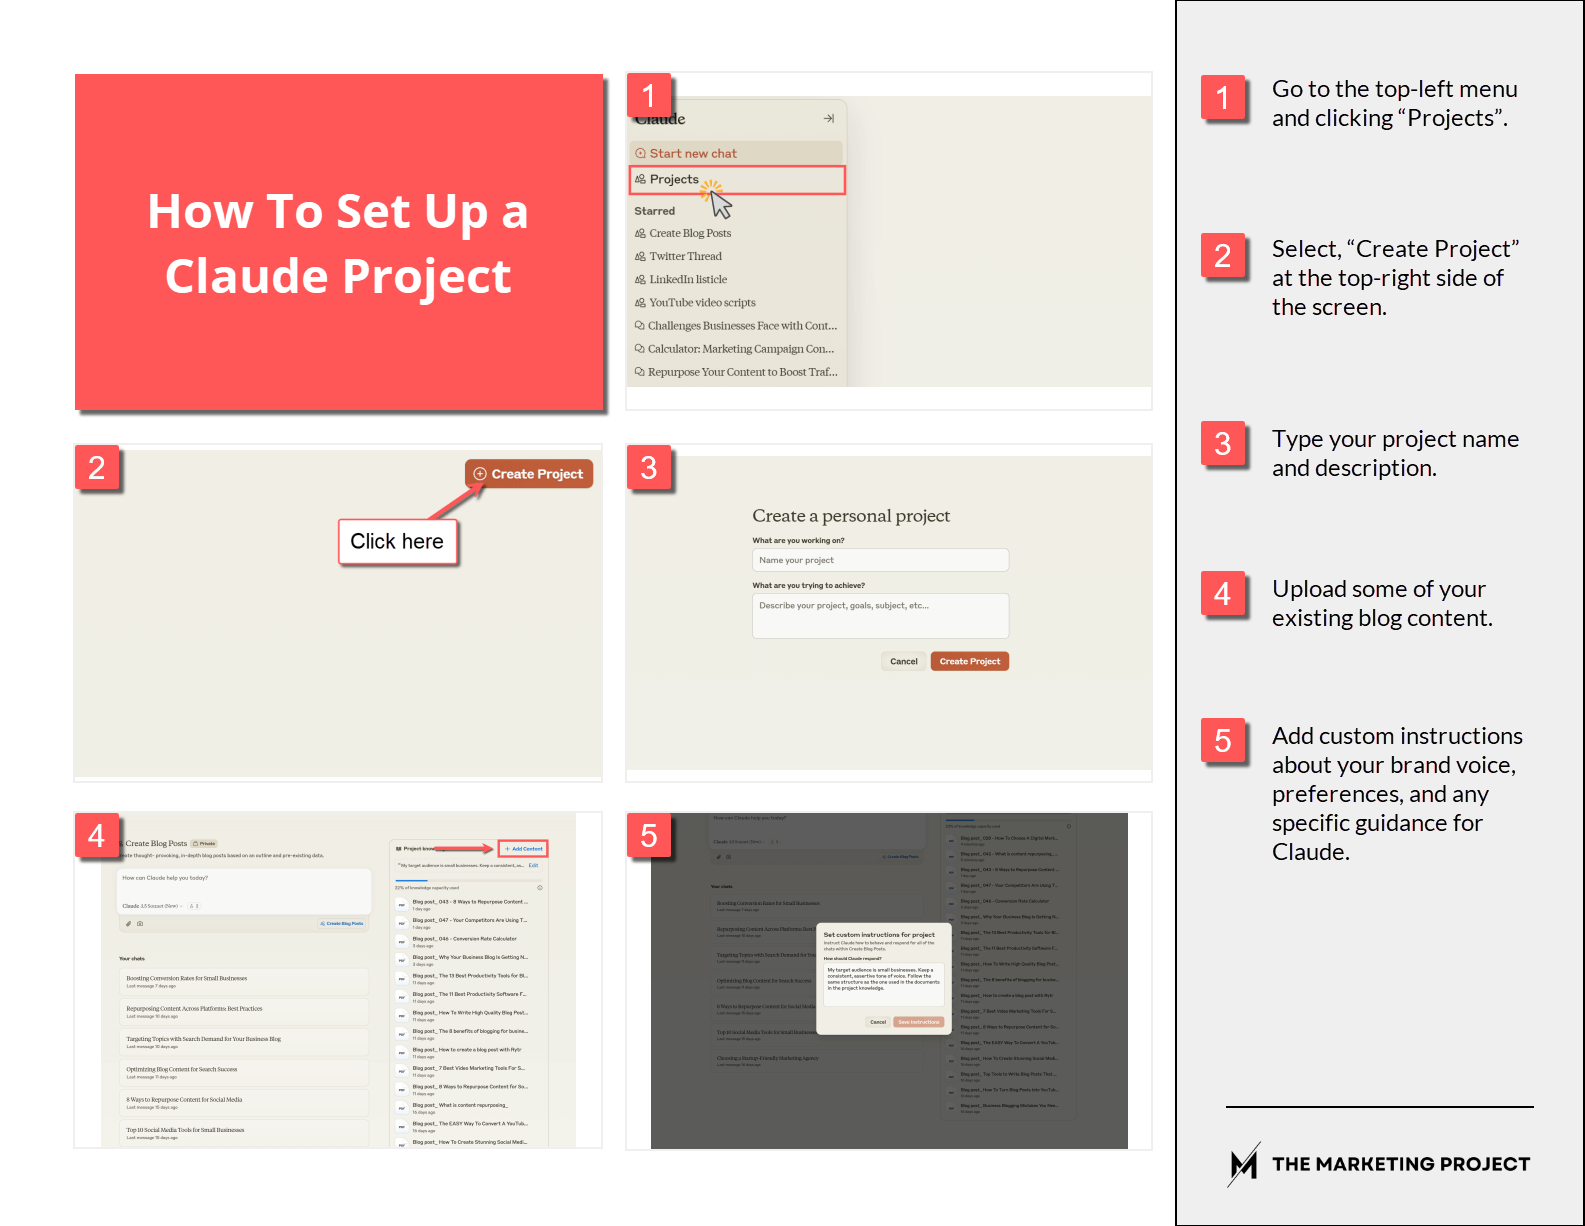
With that said, here's what you need to do to set up a project:
And one last (but very important) note:
Every piece of content you upload should be original and written by you or a professional writer. Avoid using AI to write them.
Remember that the quality of Claude's output depends on the quality of the data it's trained on. So, the more high-quality, original content you upload, the better the results will be.
Are you struggling to create blog content consistently?

If you're looking to create blog content that drives organic traffic to your business blog but don't have the time or resources to implement these strategies yourself, we can help.
We offer blog writing services backed by thorough keyword research and SEO best practices. Check our blog writing service page if you'd like us to take care of blog writing for you.
Research and create your blog post outline
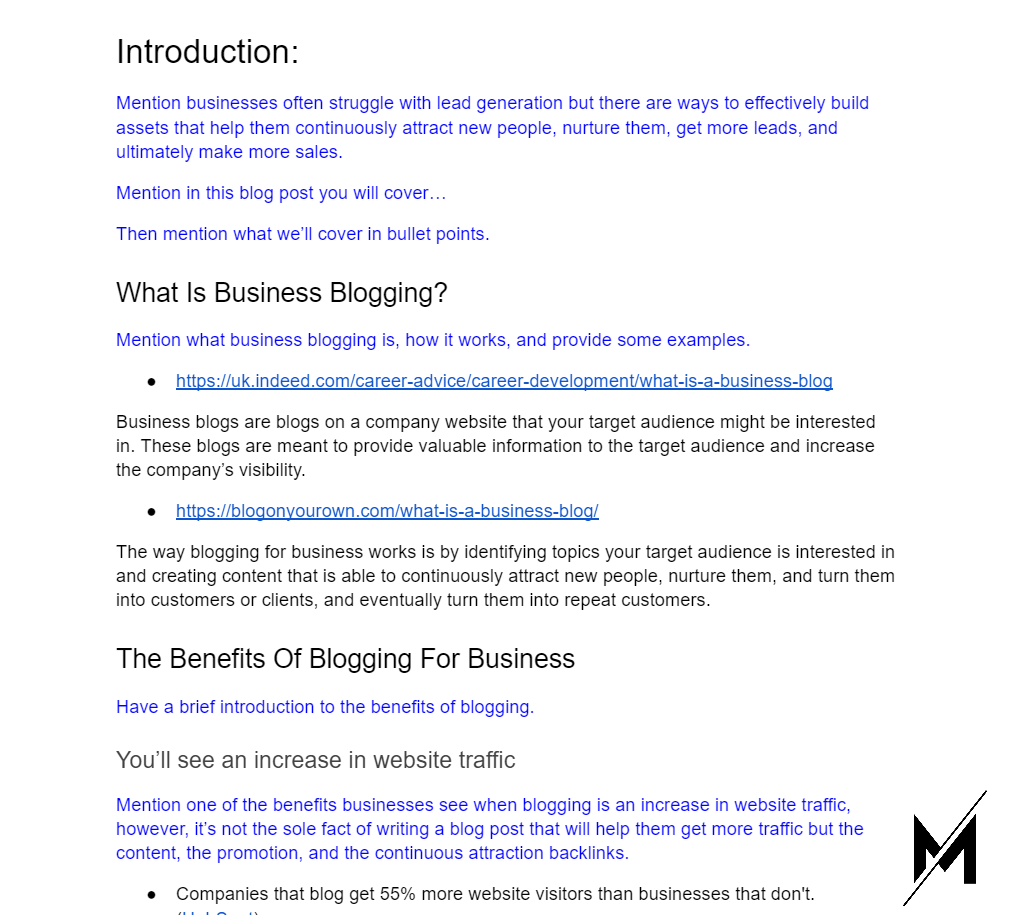
Once your project is ready, the next step is to research and create an outline for your blog post. This part is key, so don't skip it!
Proper research helps you:
So, take your time. The more thorough your research and outline, the better your final post will be.
When you’re done with your outline, add specific instructions for Claude. These are the commands that will guide it on how to tackle the topic.
Prompt Claude to write your blog post
First, upload your research and outline. If you are using Google Docs, just download it as a PDF and upload it into your new chat.
Then, be specific about what you want:
And that’s pretty much it. Claude will analyze all the documents in your project and the information in your outline to craft your post.
Here’s a template you can use to prompt Claude to create blog posts for you:
Write a blog post about [insert your blog topic]. I wrote a blog post outline, it's the PDF attached to this message. Use that outline to write my blog post. My target audience is [insert your target audience].
Edit your first draft
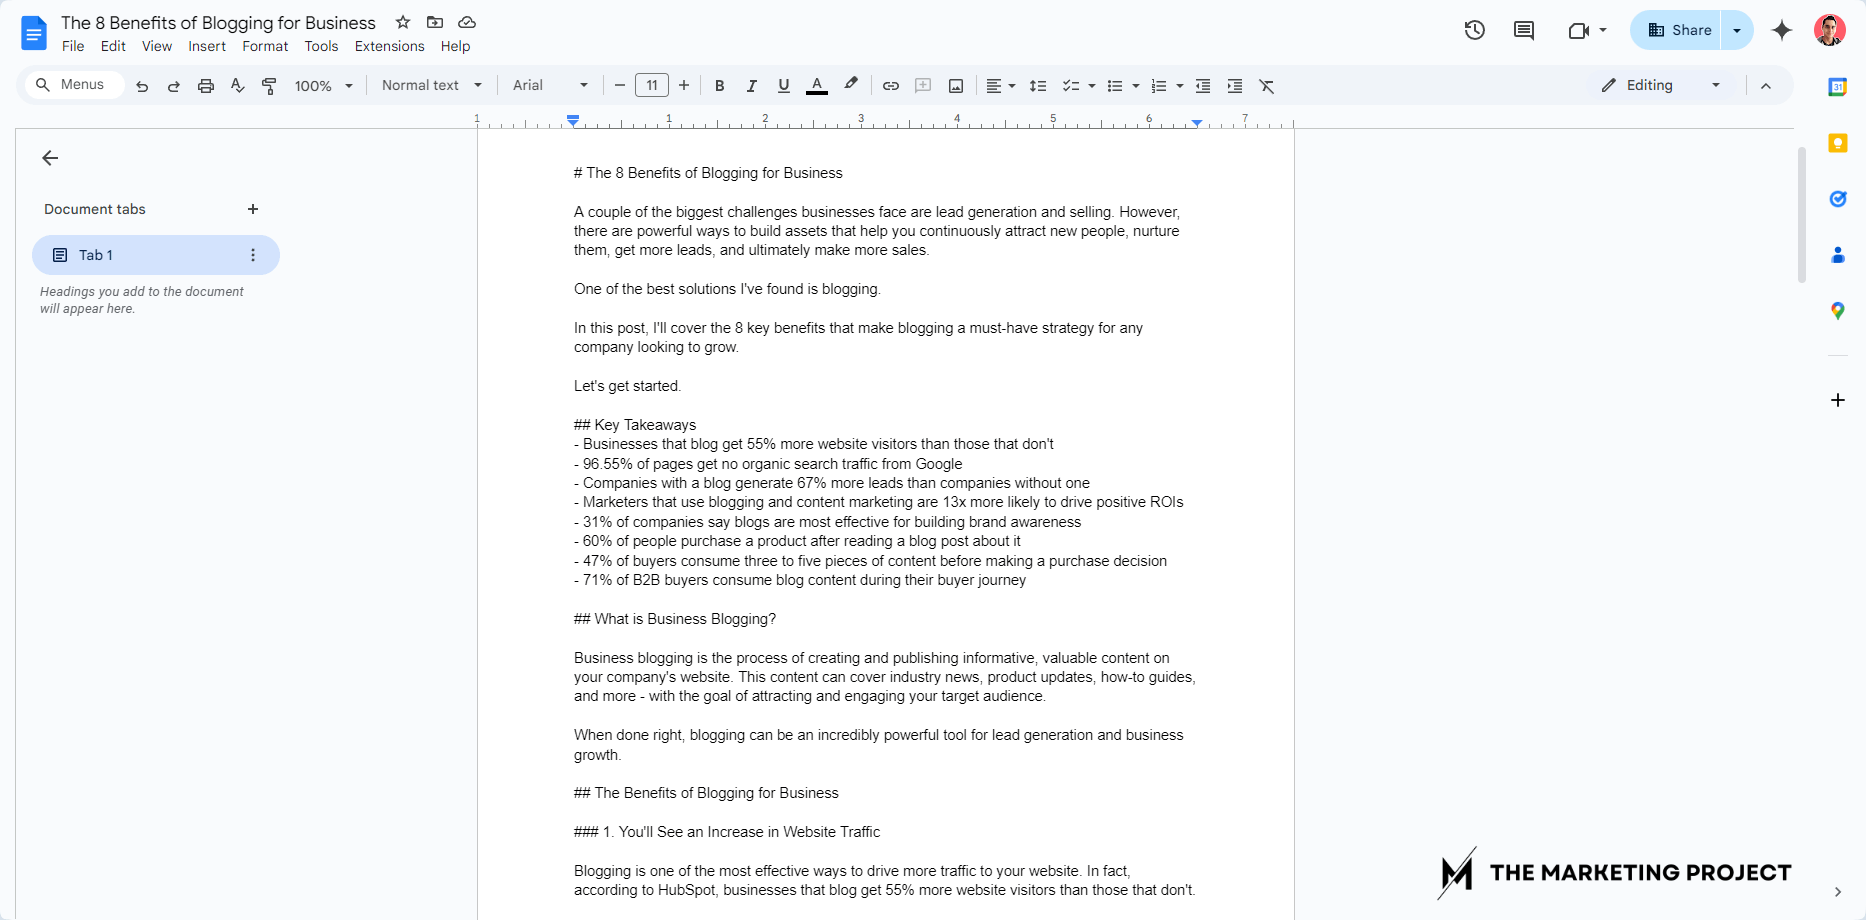
When you get your first draft from Claude, don't just publish it right away. Copy your content to a Google Doc and look for:
Honestly, most of the drafts Claude produces are fine as is so I don’t have to modify them much. But it really depends on the quality of the outline and the prompts you write.
So if the output isn’t great the first time, just tweak the outline and try again. But do it in a new chat, otherwise Claude will have to analyze your entire conversation, and it’s possible you will go through all your usage limits.
If that happens, you’ll have to wait five hours to start again. I’ve never hit that limit myself, but it’s something to keep in mind.
Send your content for review
Once you've edited your first draft, it's time to get a second opinion. Send it over to an editor or a colleague for review.
After spending so much time on it, it’s easy to miss little things. Having a fresh set of eyes on your content can make a big difference.
If you don't have anyone else to review your content, don’t worry. Just take a one or two-day break, and then come back to it with fresh eyes. Trust me—you'll spot things you missed before.
Edit your final draft
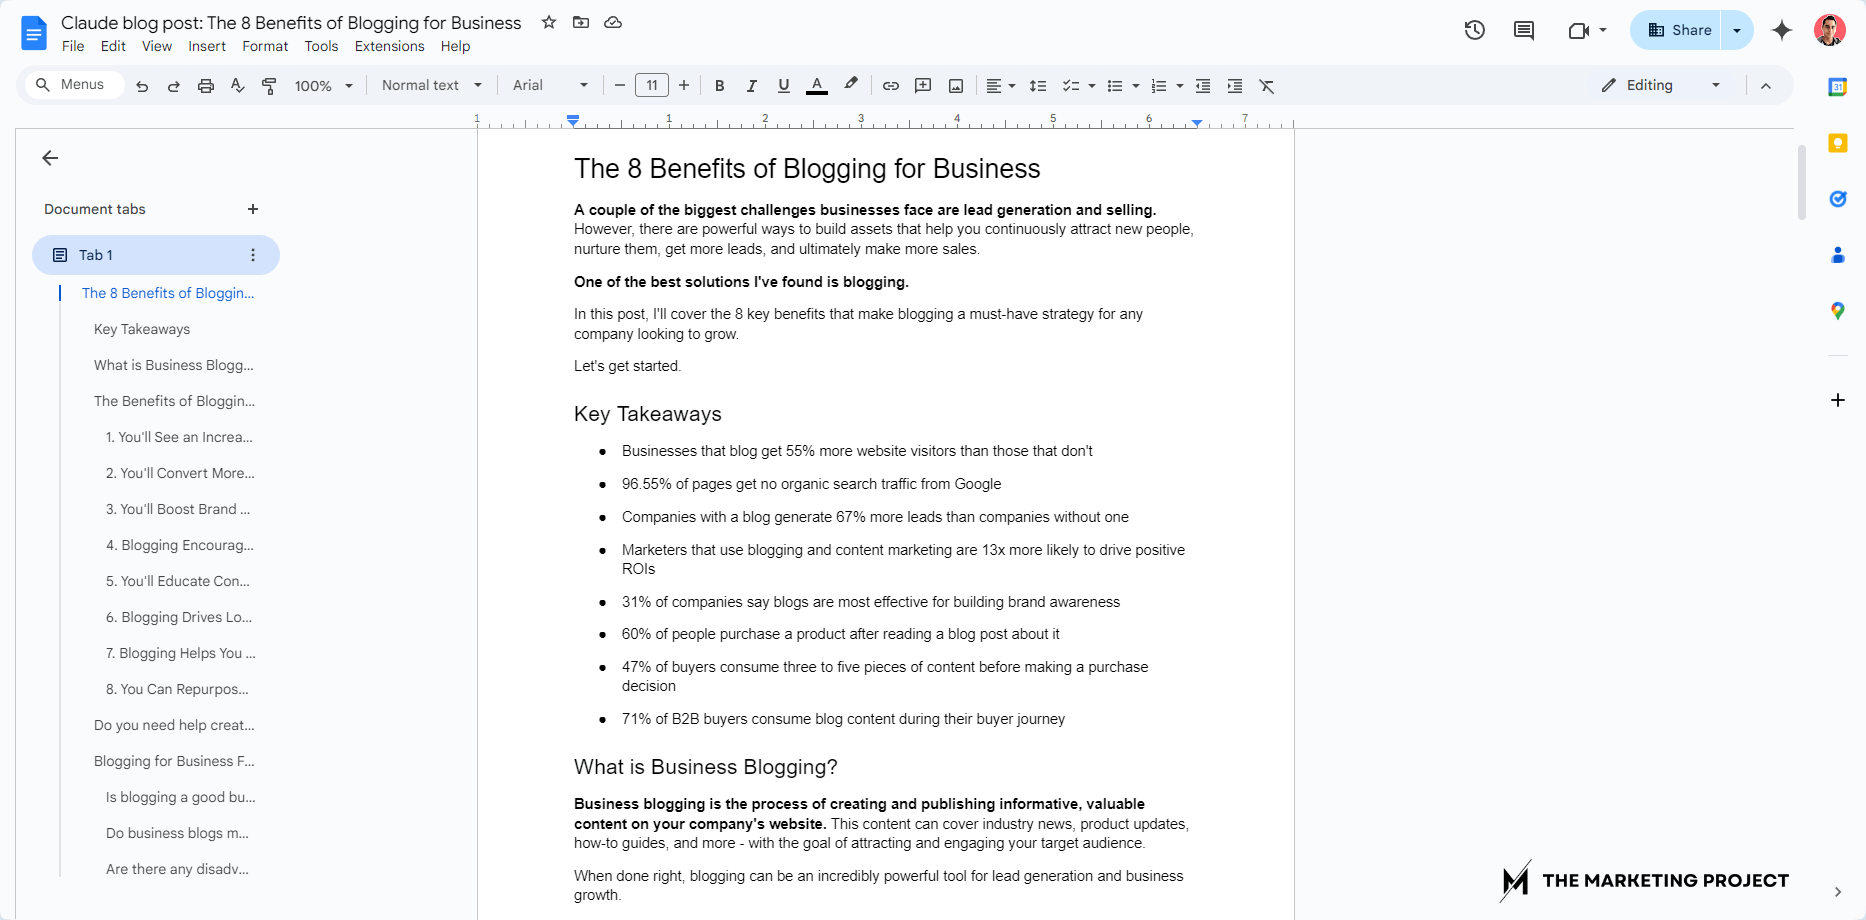
After gathering feedback, polish your final draft. This is your chance to:
Schedule or publish your content
As soon as you finish your final draft, you're ready to schedule or publish your blog post.
Just make sure to:
And that’s it!
Grab a beer, tea, or whatever you’re into, and celebrate. 🥂 Then come back and do it all over again. 😉
My closing thoughts
There are many ways to create blog posts with AI, but this is the process that works best for me for quickly coming up with new blog content without compromising on quality.
Just remember that the goal isn't just to publish content—it's to publish content that genuinely helps your audience, ranks in search engines, and helps you meet your business goals. So, follow this process, it’ll help you do just that.
And since you're thinking about creating blog content consistently, check these guides right here. 👇 I'm sure you'll find them useful.
