There are thousands of ways to write high quality blog posts, however, we created a process that works incredibly well. In fact, this is the fastest and best way we've found.
Hi, my name is Jonathan Nunez, I’m the CEO and co-founder of The Marketing Project. We’ve created over 500 blog posts with the exact same process I’m about to show you so we know it works well.
So, in this blog post, we'll cover how to research a blog post, outline it, and write it fast.
Let’s get started.
More...
Keyword research disclaimer
Alright, this blog post will not go over keyword research so if you want to do that, I recommend you check guides from companies like Moz, Semrush, and Ahrefs. They have fantastic resources you can use.
Also, we’ll assume you already did keyword research and you found the topic you want to target. As such, we’ll start with the next step in the process.
Create a blog post outline (key info)
The first thing we need to do is create a blog post outline. A blog post outline essentially works as a guide to help us focus on the right information so we can create better content faster.
Every time you create a new blog post, think about the purpose of that piece of content. This is very important because it will shape the outline you create, how you tackle the topic, and the overall writing of the blog post.
Researching your blog post outline
The first thing you should focus on is researching what’s already out there.
But before you do that, I just want to mention that if you want to create content for another country or language, you have to adjust your search settings.
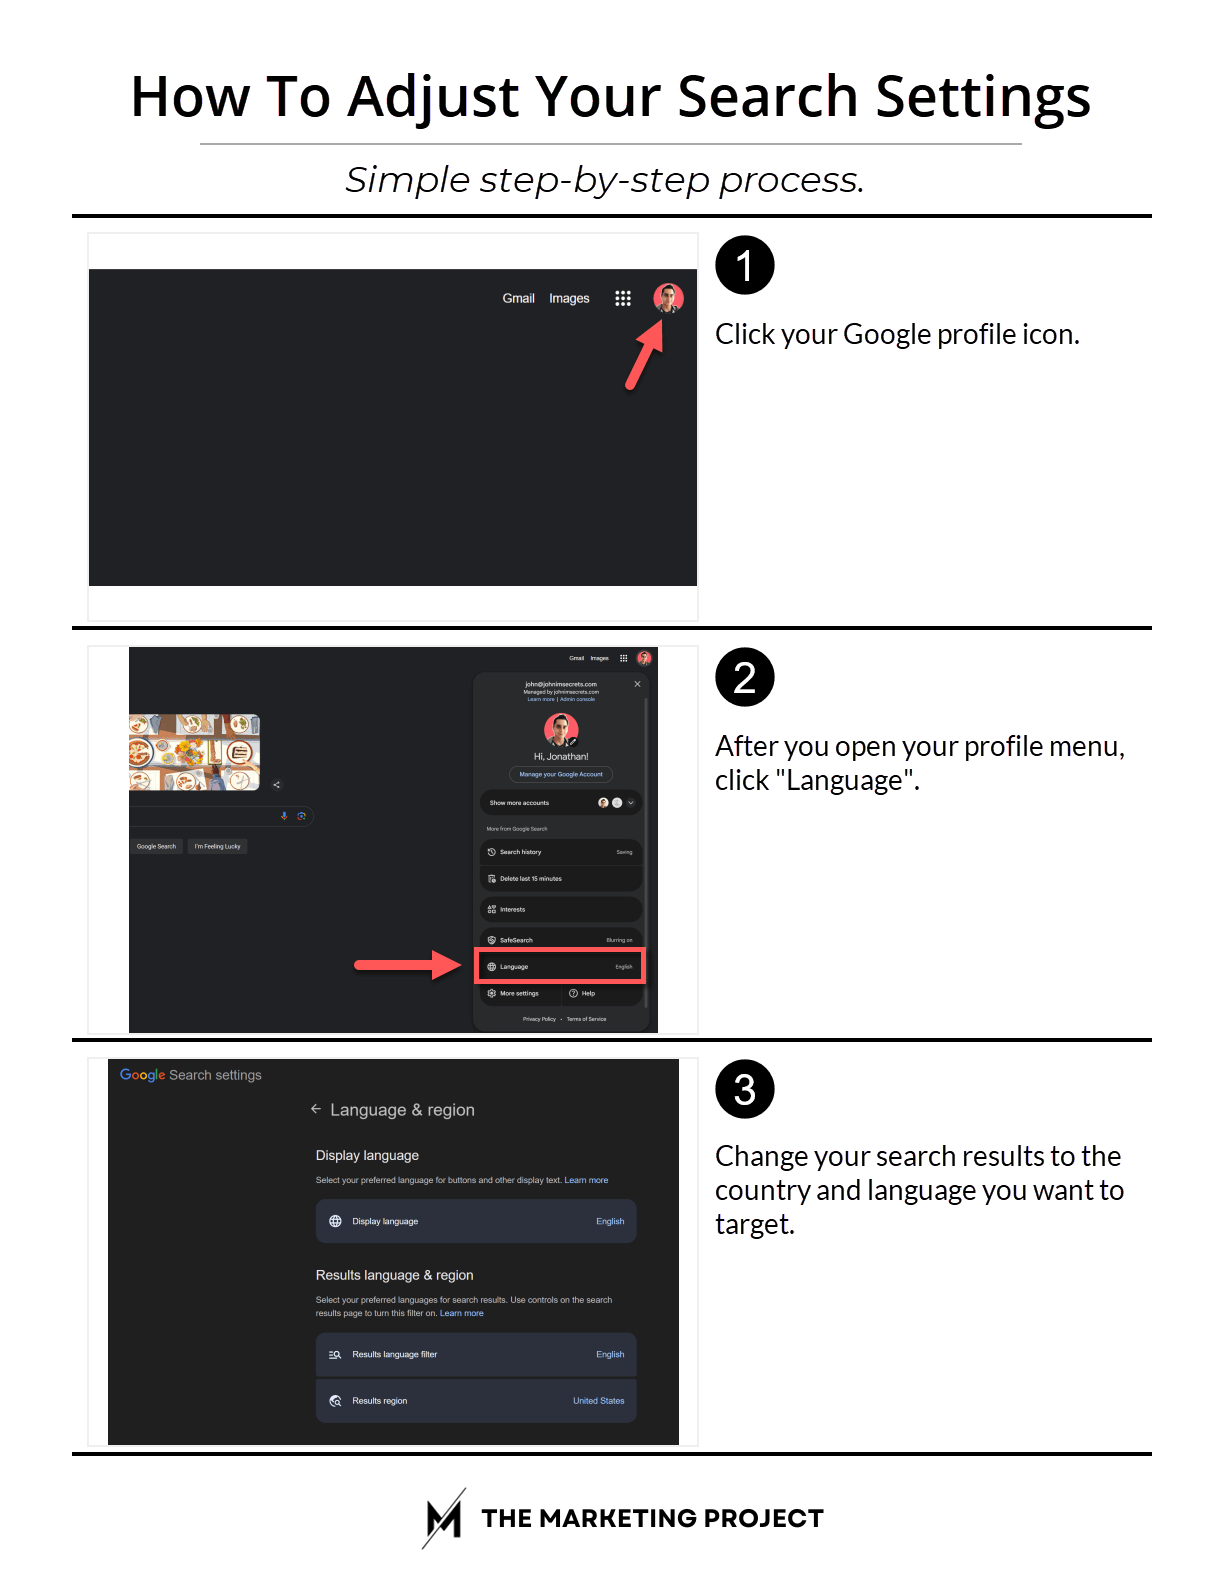
The simple three step process you should follow to adjust your Google search settings.
To do that, all you have to do is head to Google and click on your profile icon. Then select, “language”. That will take you to your language and region settings. There you can select the language you want to see results in and the region. Just choose the language and place you want to target.
After that, head back to Google and search for the keyword you want to target. Then open the first three or four organic results in new tabs.
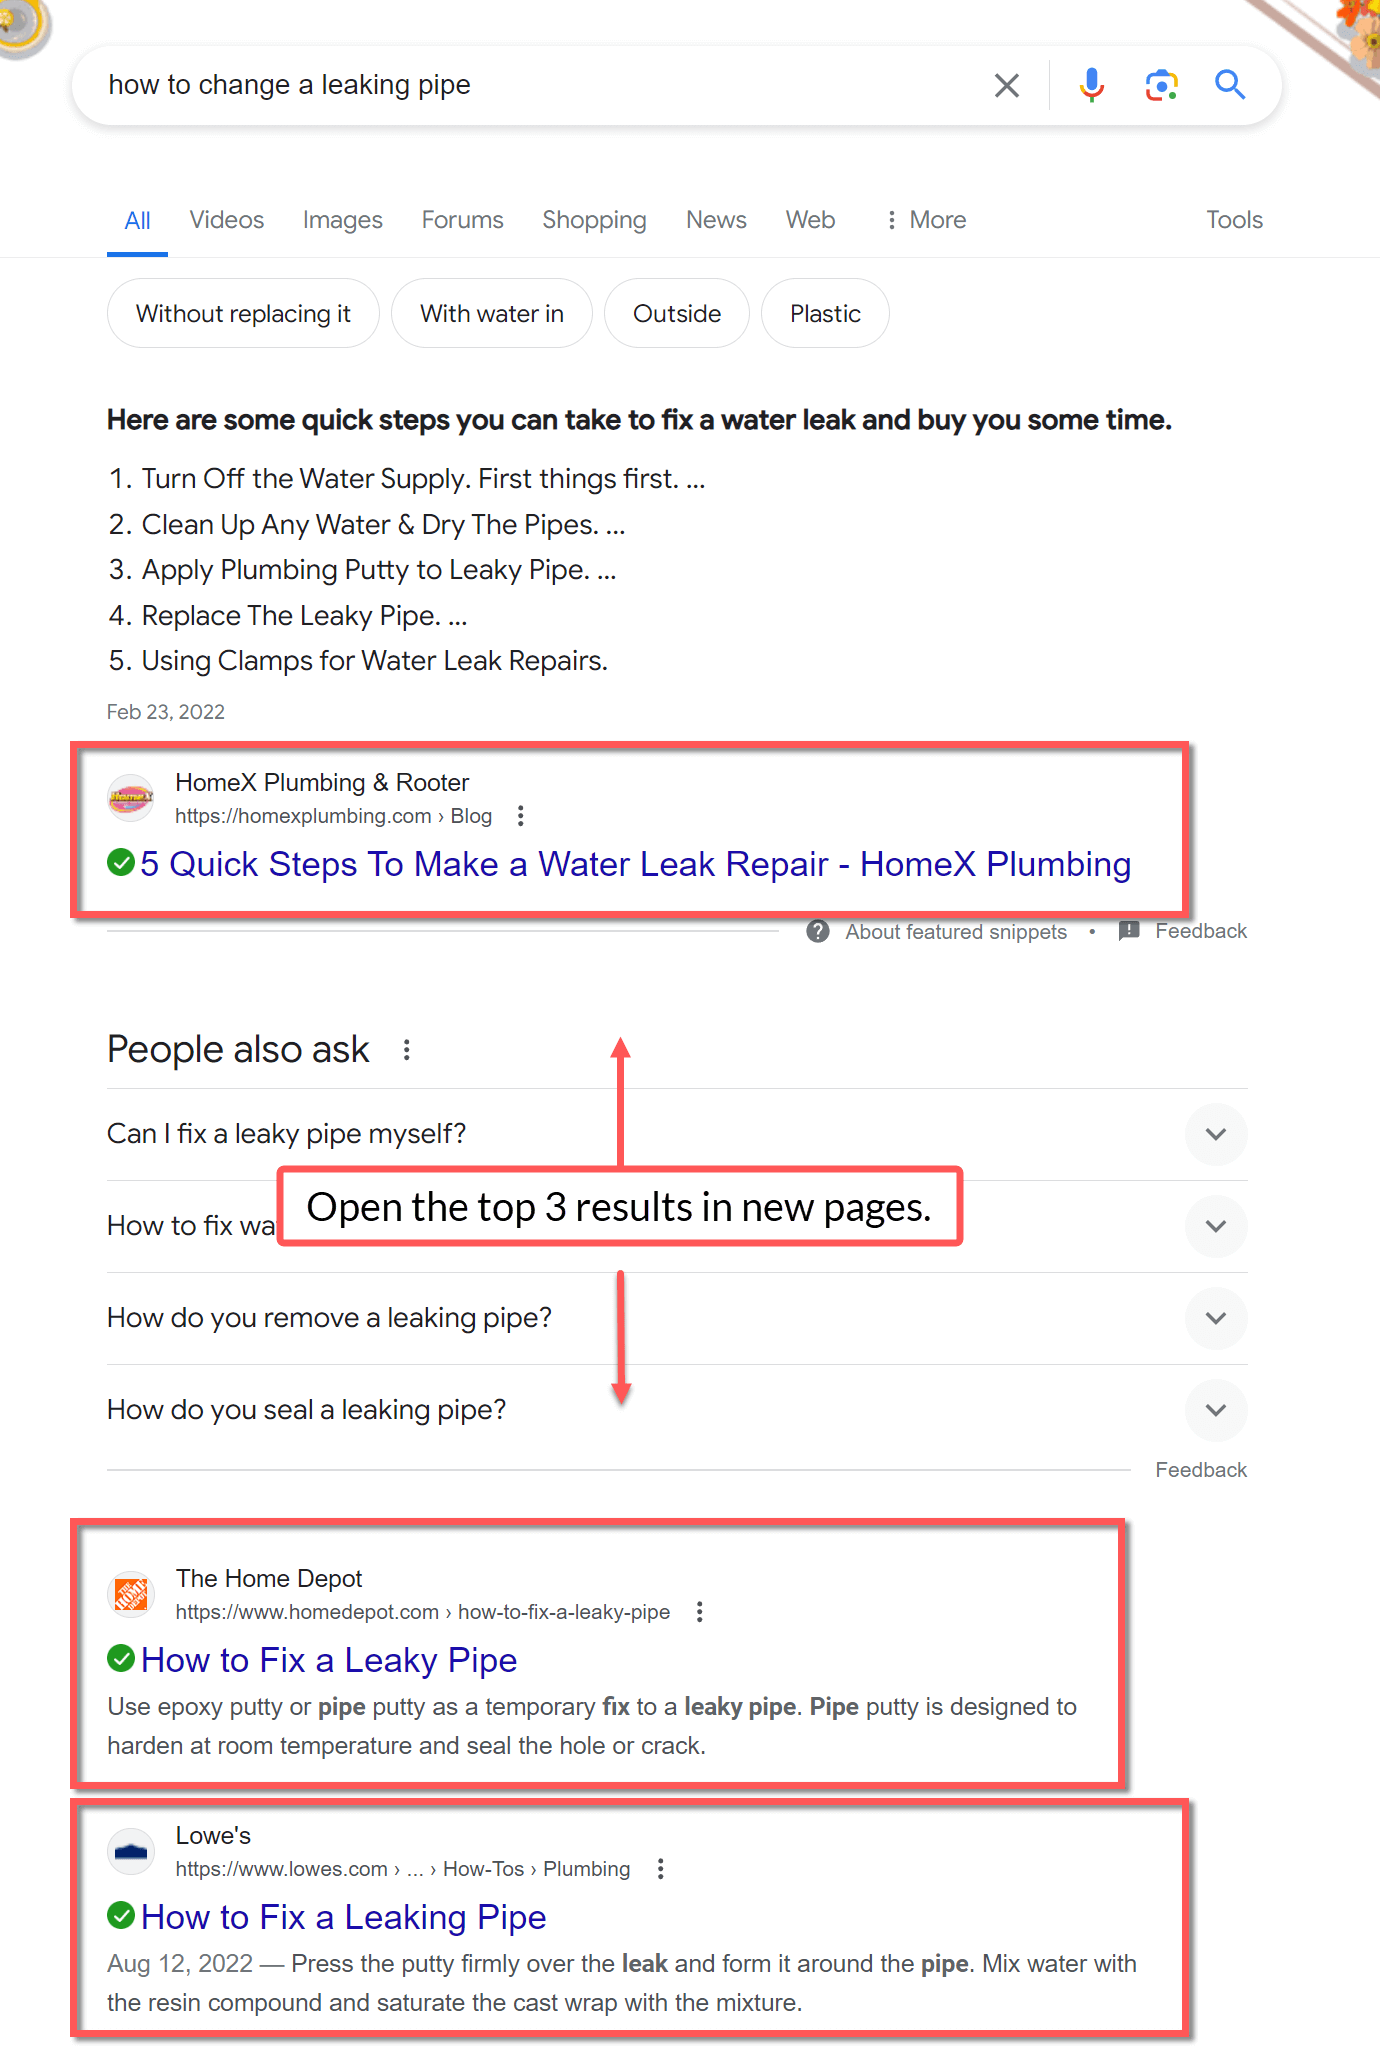
The top three search results on Google for the search "how to change a leaking pipe".
At this stage all you have to do is copy all the headings on the articles to a Google doc or a notepad. This is so you can analyze all the sections in the top results.
The problem is that this process is very time consuming but thankfully, there are some tools that can help us with this. The one we use and love is the Ahrefs SEO Toolbar.
It’s available for Chrome and Firefox so you can use it to get some SEO insights and quickly get access to things like Metadata and some other important SEO information.
After you install the toolbar just click the extension icon to reveal the page’s SEO information. Then select “copy headings” to copy all the heading titles on the page.
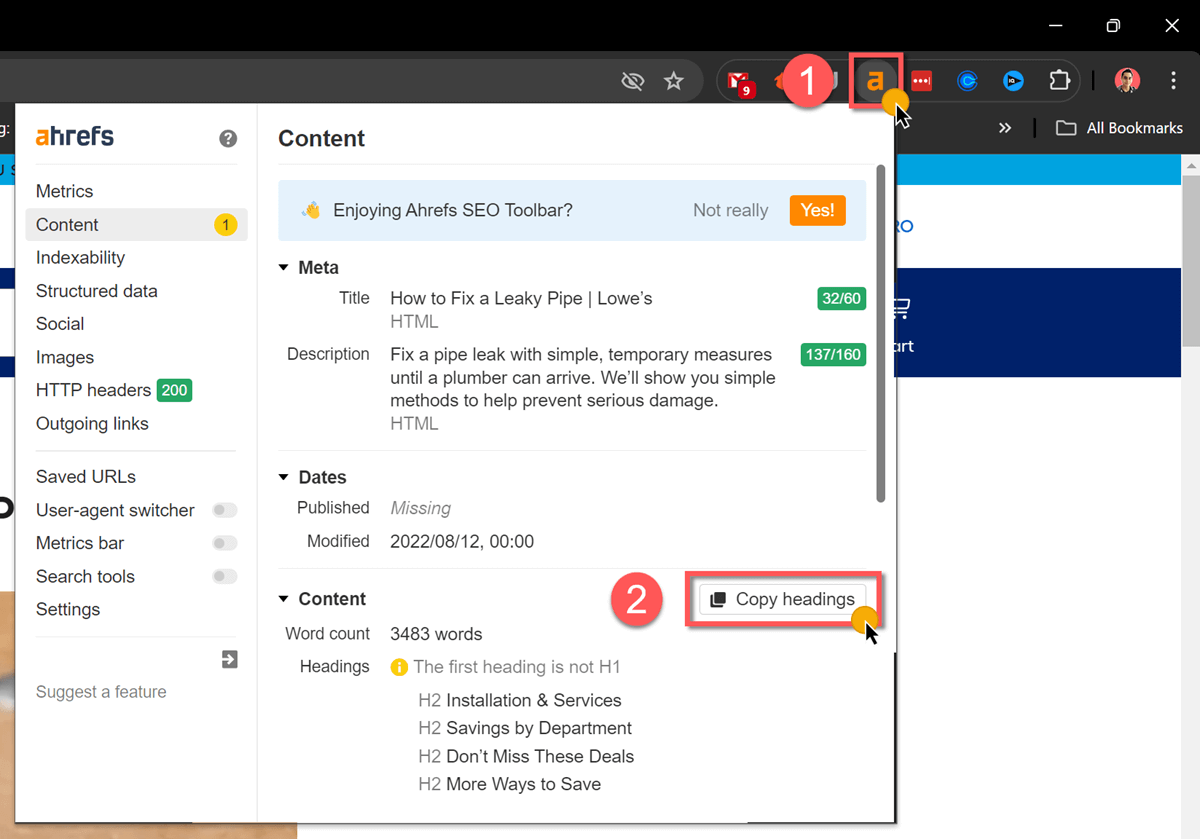
Copying headings with Ahrefs' SEO toolbar
Next, go to your Google doc or notepad and paste all the headings into your document.
Repeat this process for the top three or four ranking pages for the keywords you are targeting.
Filter all your headings
Once you are done with that, you’ll have a long list of headings. What you want to do is spot trends. What we mean by this is, identify all the headings that repeat themselves and remove duplicates.
This will make it so you have a short list of topics to focus on.
Also, if there’s more information you want to include in your blog post, add it to the list. For example, you can include calls to action or other information you know is important but that’s missing.
Create a blog post structure
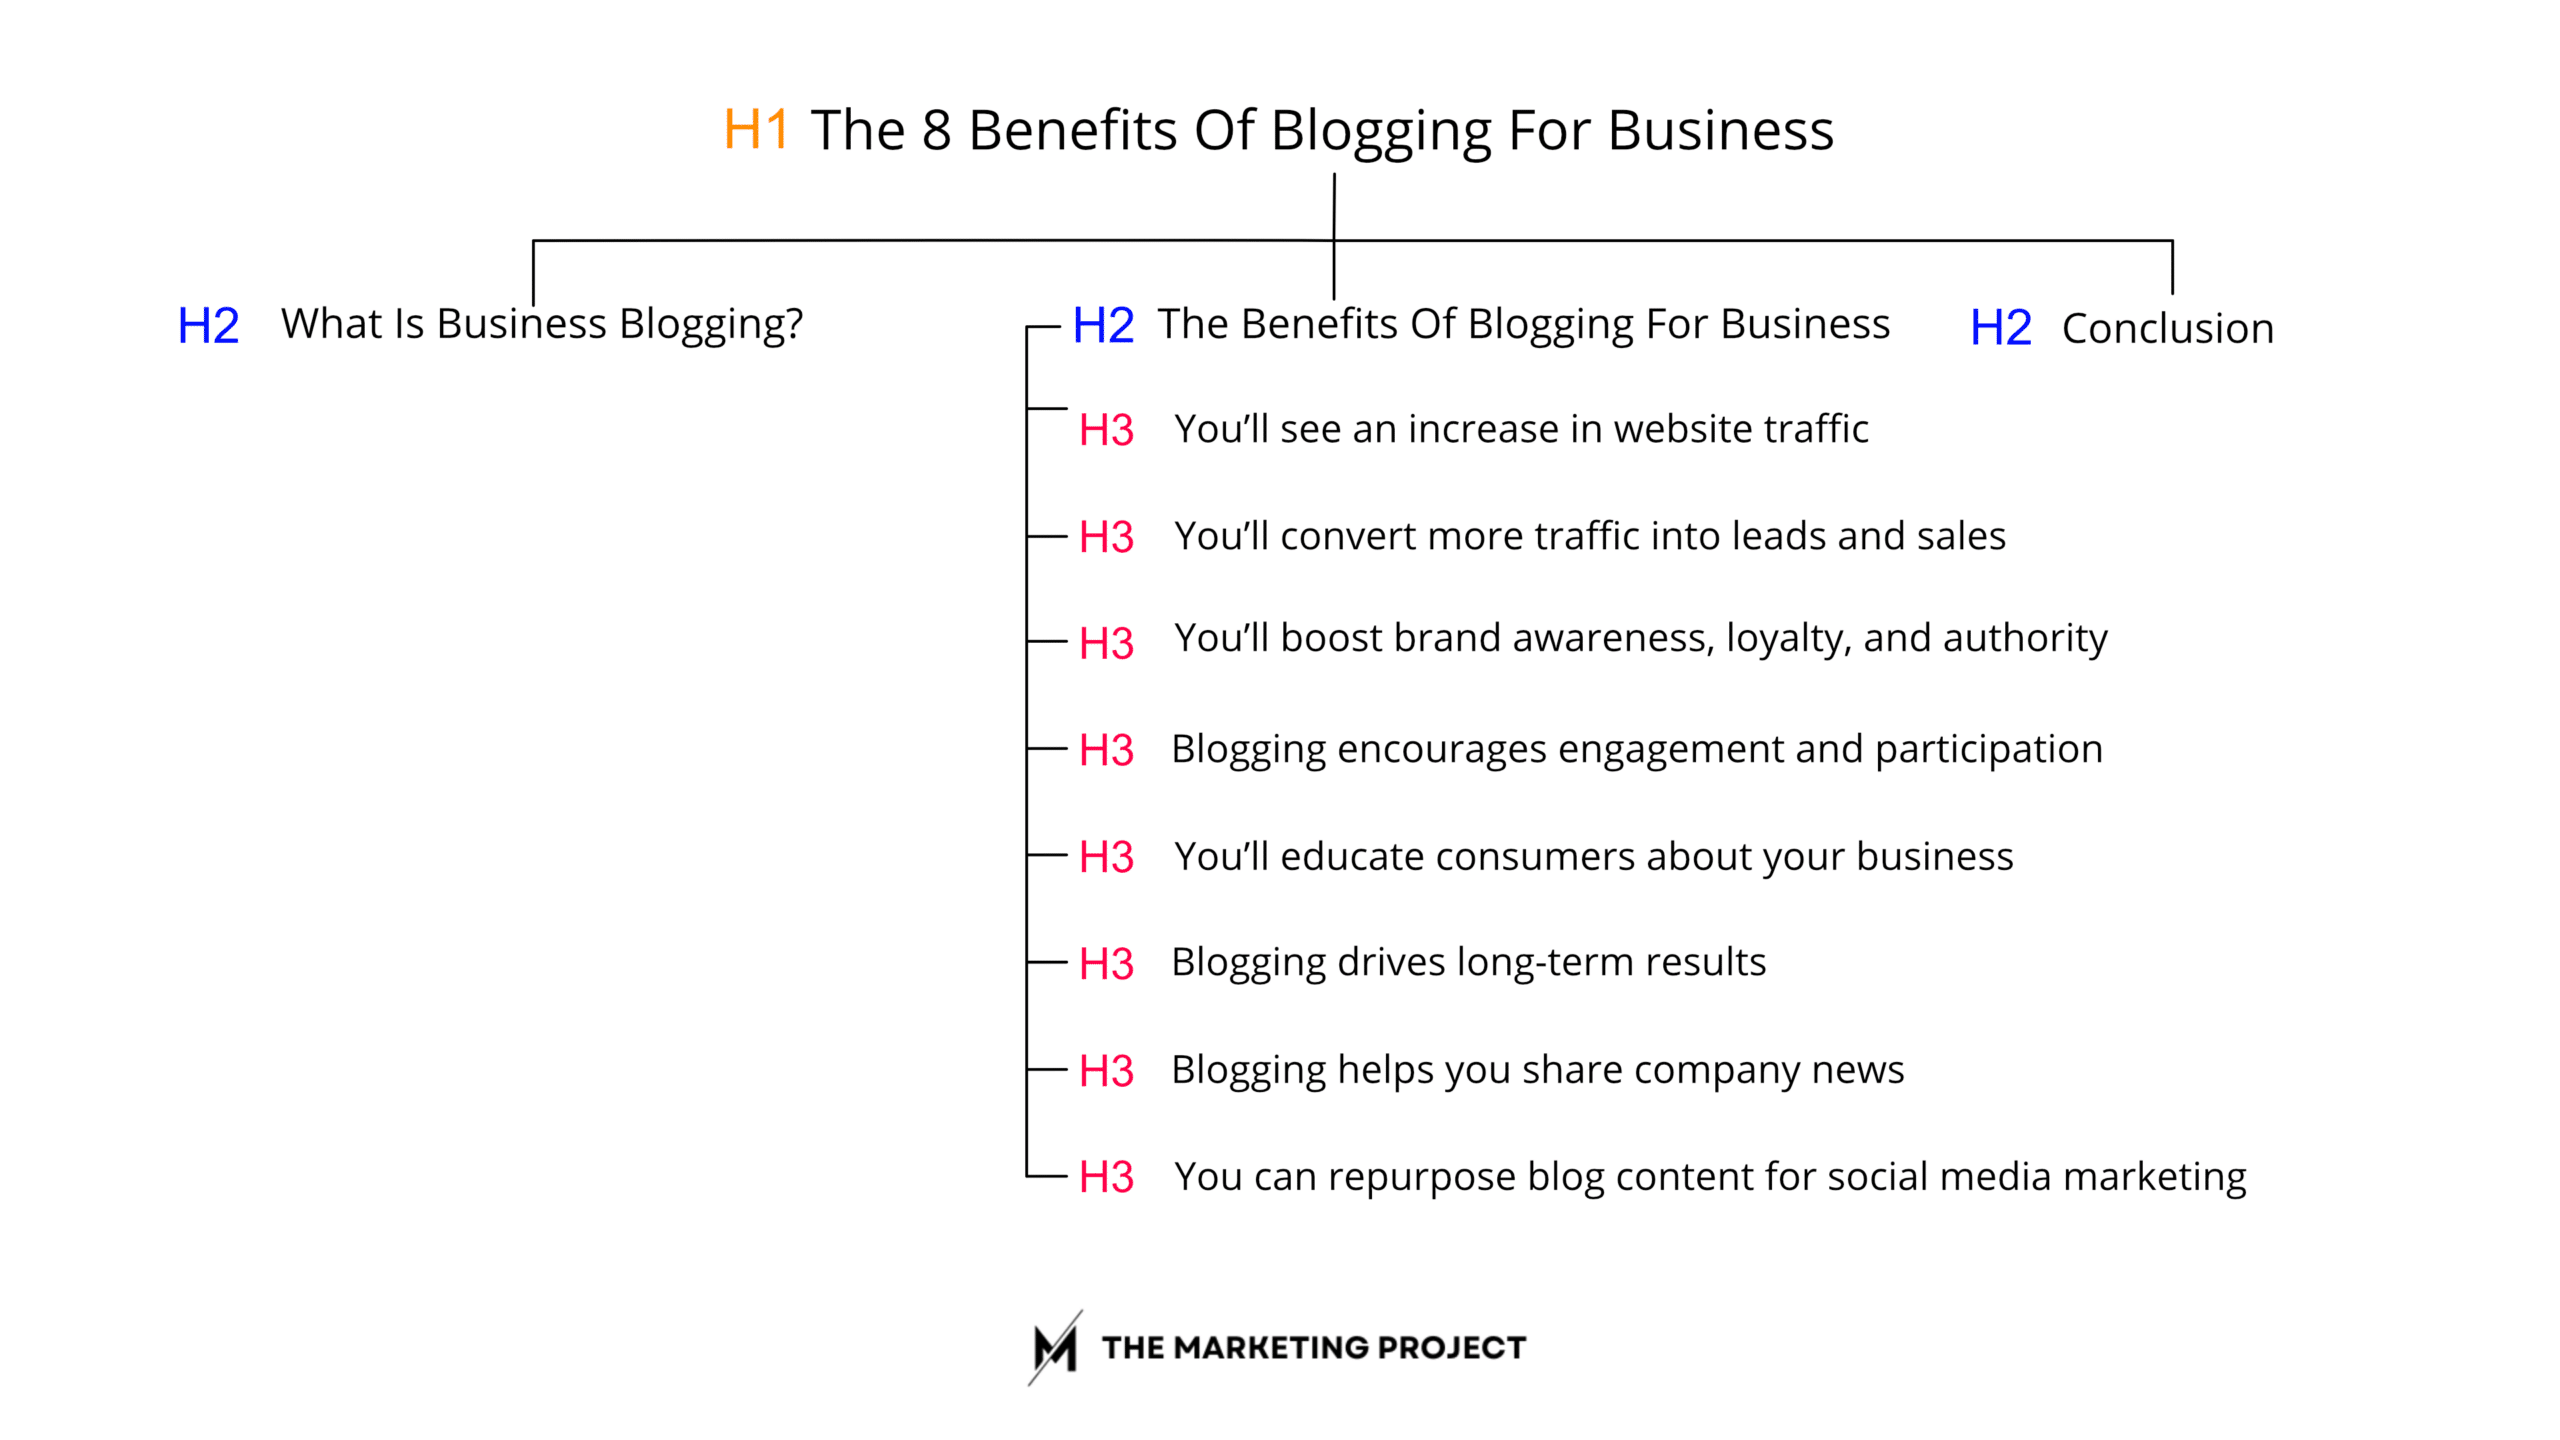
The next thing you should do is create a blog post structure. This step is all about identifying how you’ll categorize your content so it flows properly and it’s structured well.
Think of it as having topics and sub topics. An example would be, having heading 1 as the title of the blog post, heading 2 as the sub topics, and heading 3 as the individual steps or sections in your subtopics.
That’s an oversimplification of headings but it should help you structure your content better.
Research content for your outline
Alright, after you are done with your blog post structure, it’s a matter of researching your outline content. This is all the content, statistics, reports, and media you’ll need for the blog post itself.
One thing we love doing is using advanced search on Google to find the information we need.
For example, you can search for [the topic you want + the data you need (keywords) + statistics] to find data.
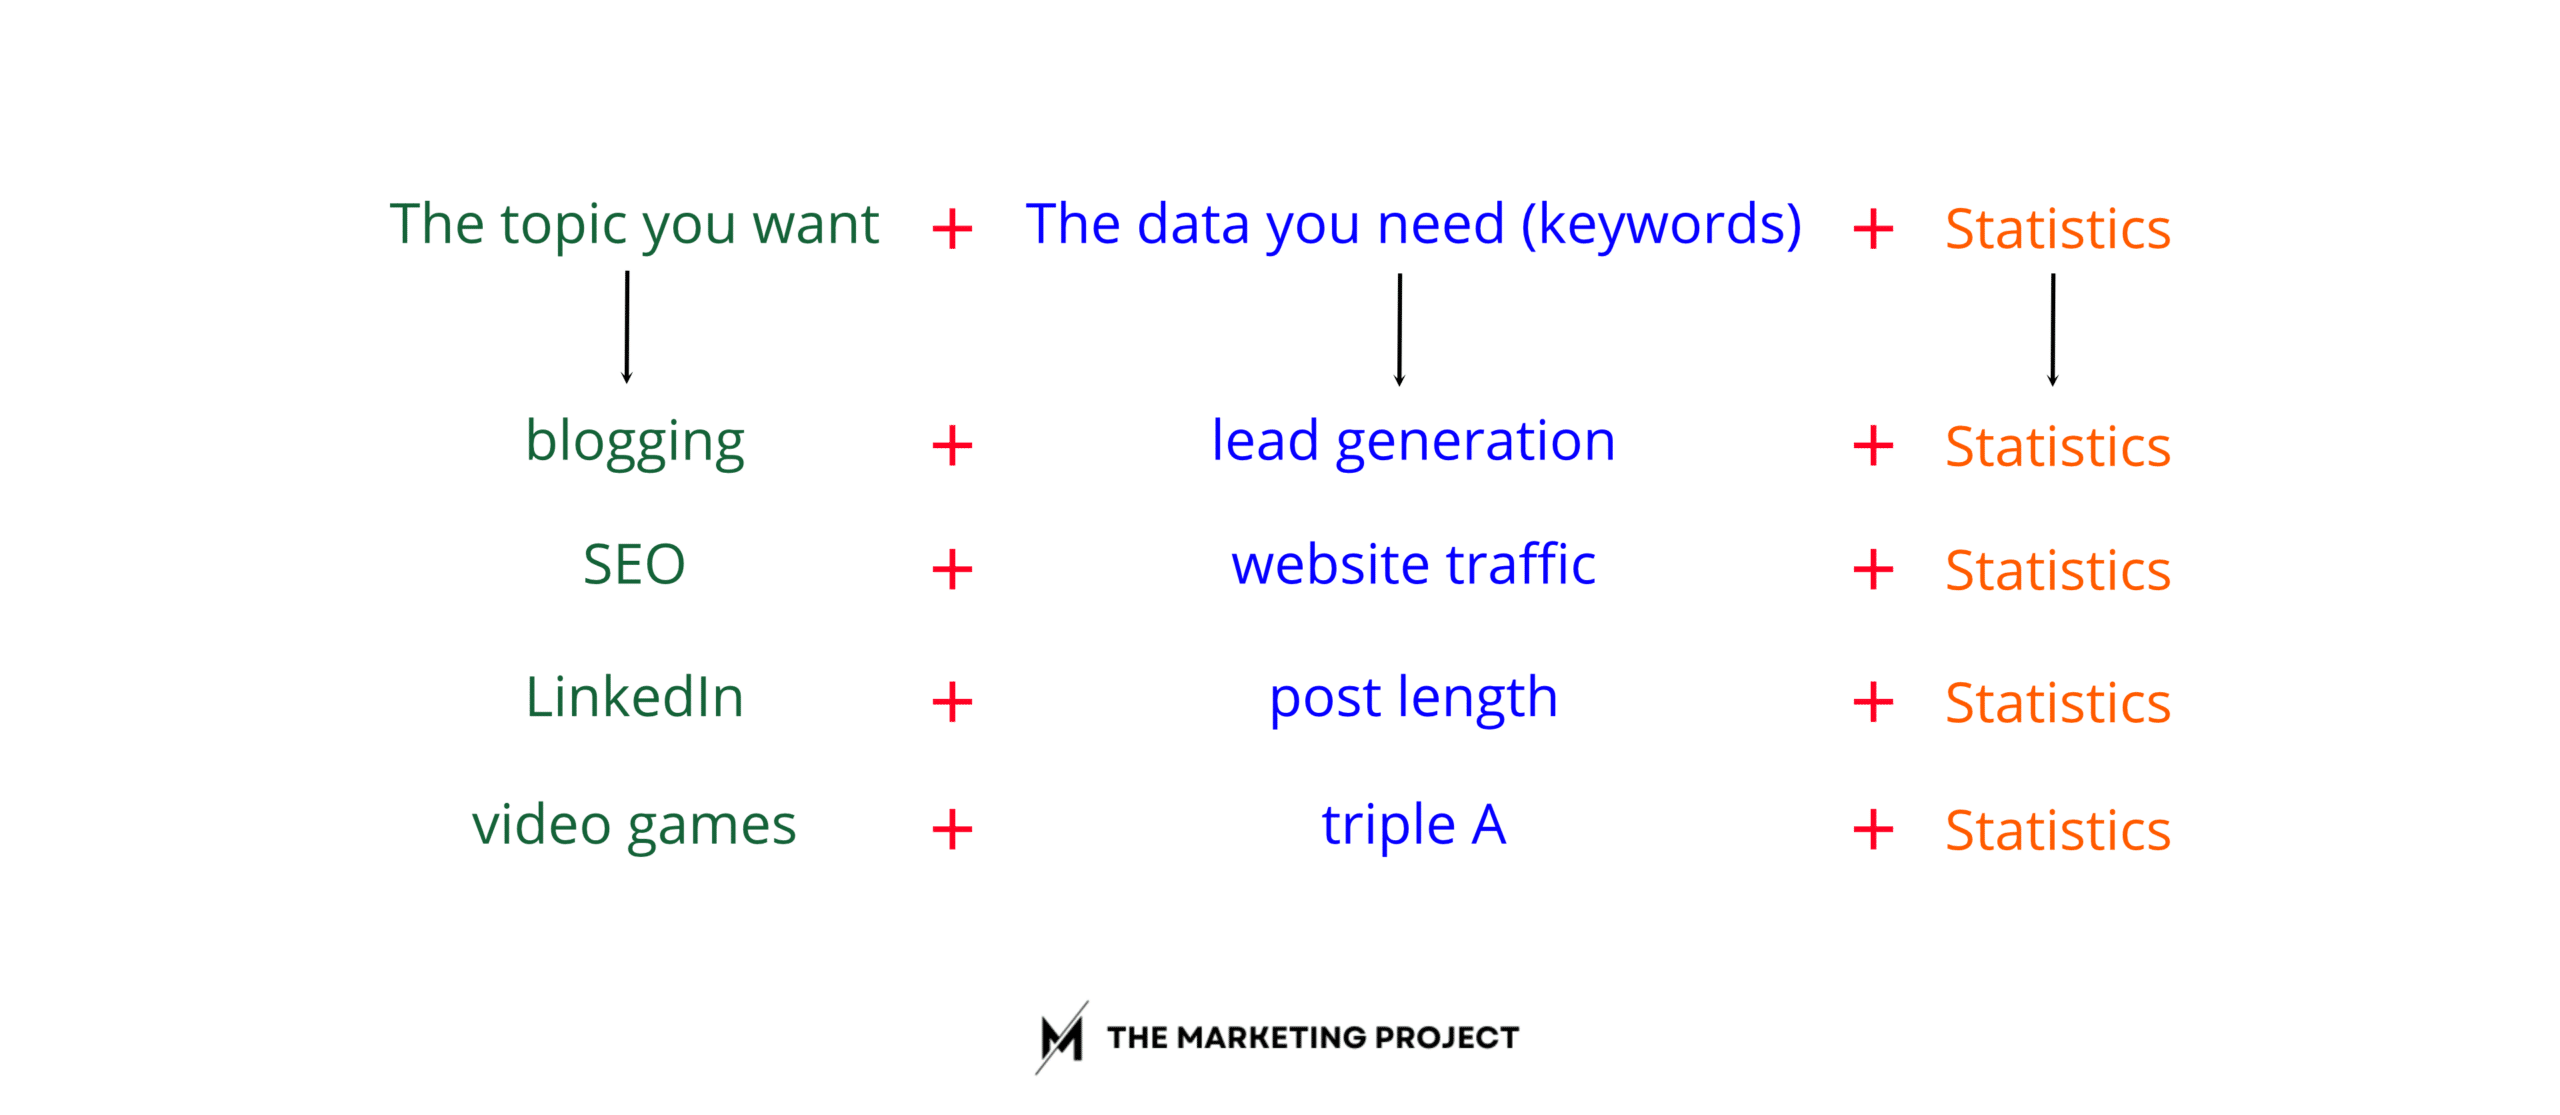
Examples of the advanced search (topic + keywords + statistics)
Or you can search for [the topic you want + the data you need (keywords) + the type of media you need] to search for specific types of content like videos and infographics.
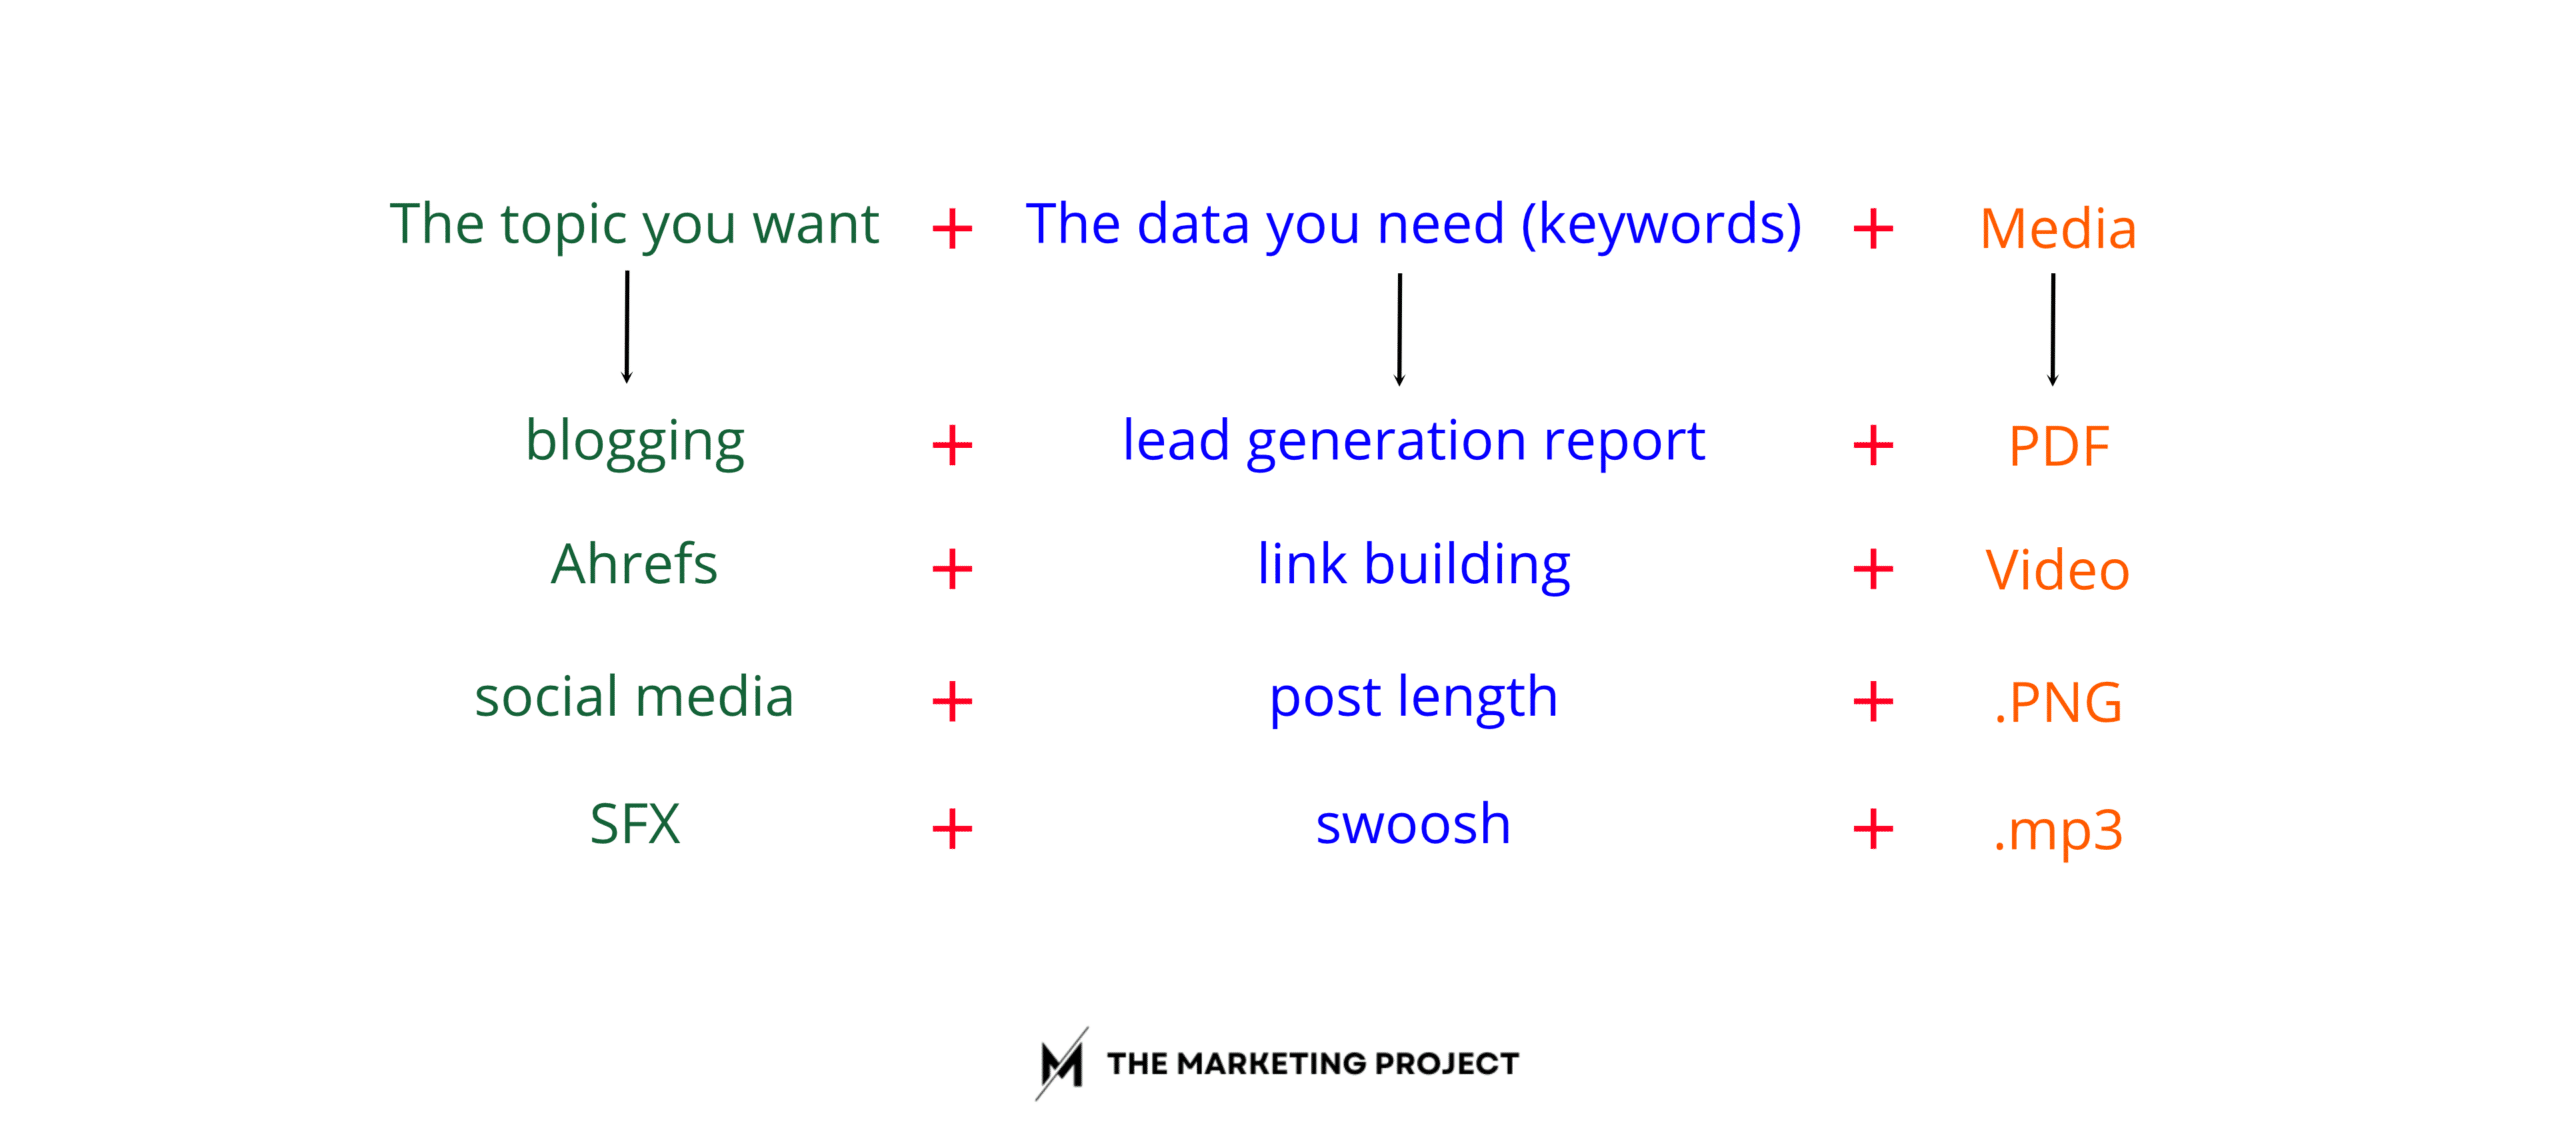
Examples of the advanced search (topic + keyword + media type)
These types of searches will make it easier to find the exact information you want.
Add resources to your outline
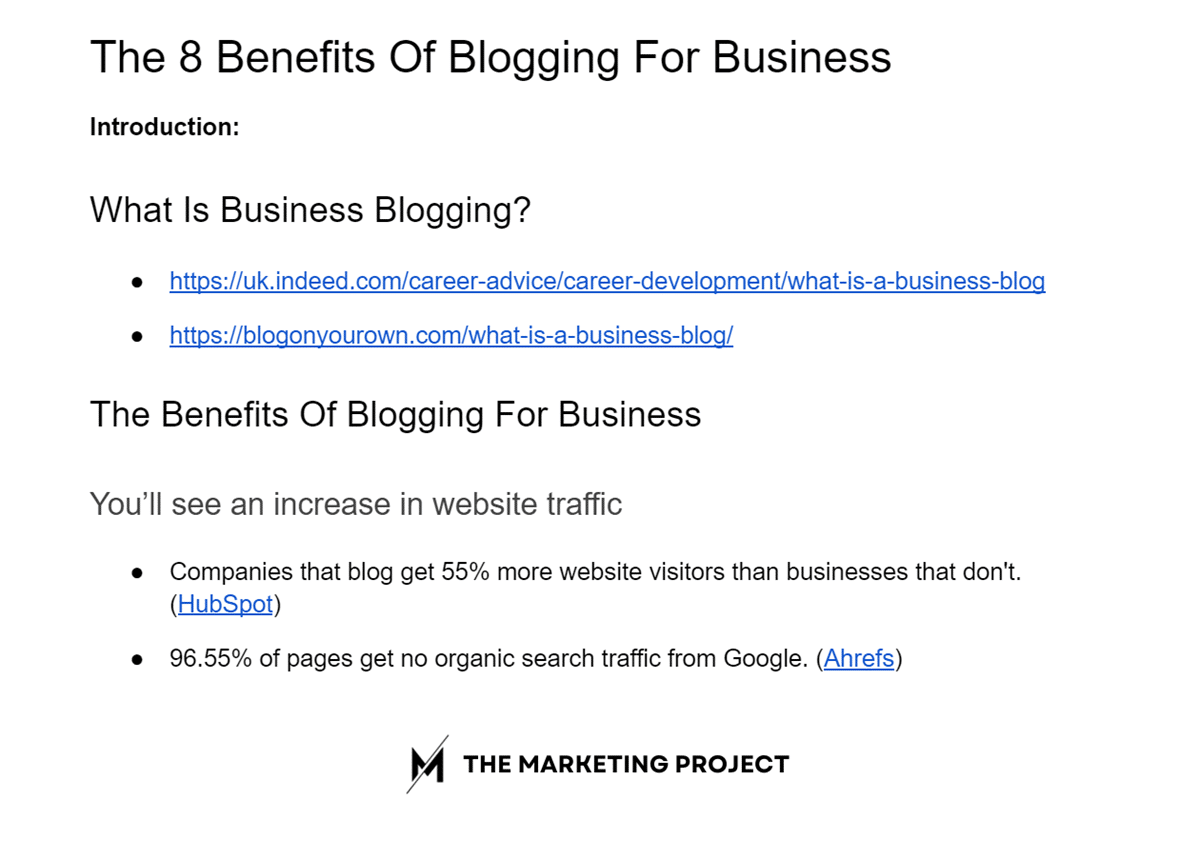
What a blog outline looks like when you add resources, data points, and sources.
When you finish searching for the information you need, simply add it to your outline. We recommend adding your data, quotes, and links below each section in bullet points to organize everything better.
Add comments on how to tackle each section
And once you finish researching all the resources you’ll use for writing your content, we recommend adding instructions to each section telling the writer how to tackle the topic.
This is especially important if you are working with other team members who are in charge of other parts of the process.
And if you are working alone, it makes it easier to identify what you need to work on next and so you don’t forget the information you found while doing the research.
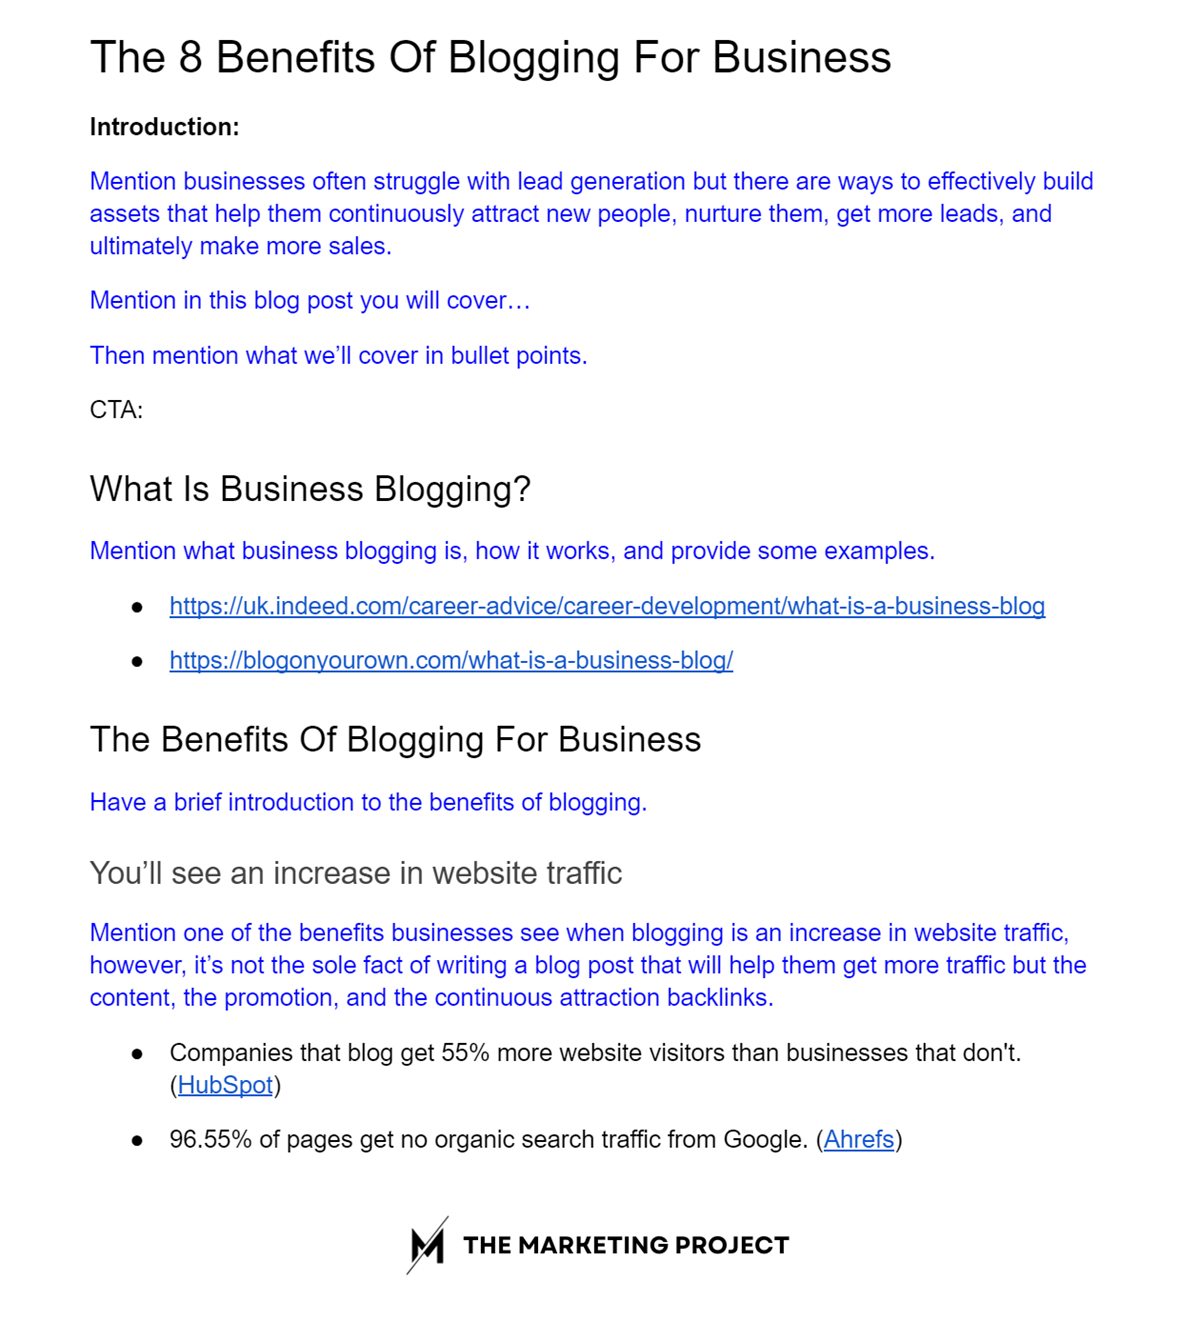
What a blog outline looks like when you add resources, data points, sources, and comments on how to tackle the blog post.
Write your blog post
Alright, the next step is writing your blog post. Take the description, all the comments you wrote, and all the resources and data you found during your research to write your blog post fast.
You can use generative AI to help you produce content faster. If you are interested, the tool we use and love is Rytr, check it out. We are sure you’ll find it useful.
Full disclosure, we are an affiliate so if you decide to purchase through our link, we’ll get a commission that comes at no additional cost to you.
So, if you decide to use our link, thank you for the support.
Add media and links
Once you finish writing your content, take the time to add links and media. Use UTM to track clicks on your links, create images for showing processes and having visual aid, and use videos whenever possible to increase the quality of your content even more.
Review your blog post
And when you finish, send your content to your content editor to make sure someone else with fresh eyes can read and review your content. A lot of the time when we create content, we are too close to it so we suffer from tunnel vision.
Also, if we’ve been creating content for a while, we feel tired and we can’t focus the same way we would if we had recently woken up. So just send it to someone else on your team for review.
Now, if you are creating content on your own, just leave it for later. Take one or two days off to rest and recover and then come back to review your content. The quality of your revision will be much higher and you will be able to spot things you wouldn’t have been able to otherwise.
Publish your content
Finally, when you finish with your content revisions, proceed with publishing. And after that, continue with your internal process for content promotion and distribution.
My final thoughts
As you can see, the majority of the time you'll invest in your blog writing is the actual research you do, so take your time to create an outline that makes it easy to understand what you are trying to communicate.
High-quality blog content is essential for attracting and engaging your audience. So don't rush through the process - put in the effort to create an effective outline, and you'll be rewarded with blog posts that are compelling and efficient to produce.
