There are thousands of ways to write high quality blog posts, however, we created a process that works incredibly well. In fact, this is the fastest and best way we've found.
Hi, my name is Jonathan Nunez, I’m the CEO and co-founder of The Marketing Project. We’ve created over 500 blog posts with the exact same process I’m about to show you, so we know it works well.
So, in this video, we'll cover how to outline a blog post, how to research it, and how to write it fast with Rytr AI.
More...
Do you want to grow your blog?

The Marketing Project is a digital marketing agency that specializes in Q&A marketing. So if you are interested in blogging for business, check us out.
We offer services like keyword research, competitor analysis, content gaps, and full content writing services.
If you have any questions, send us a message.
Create a blog post outline
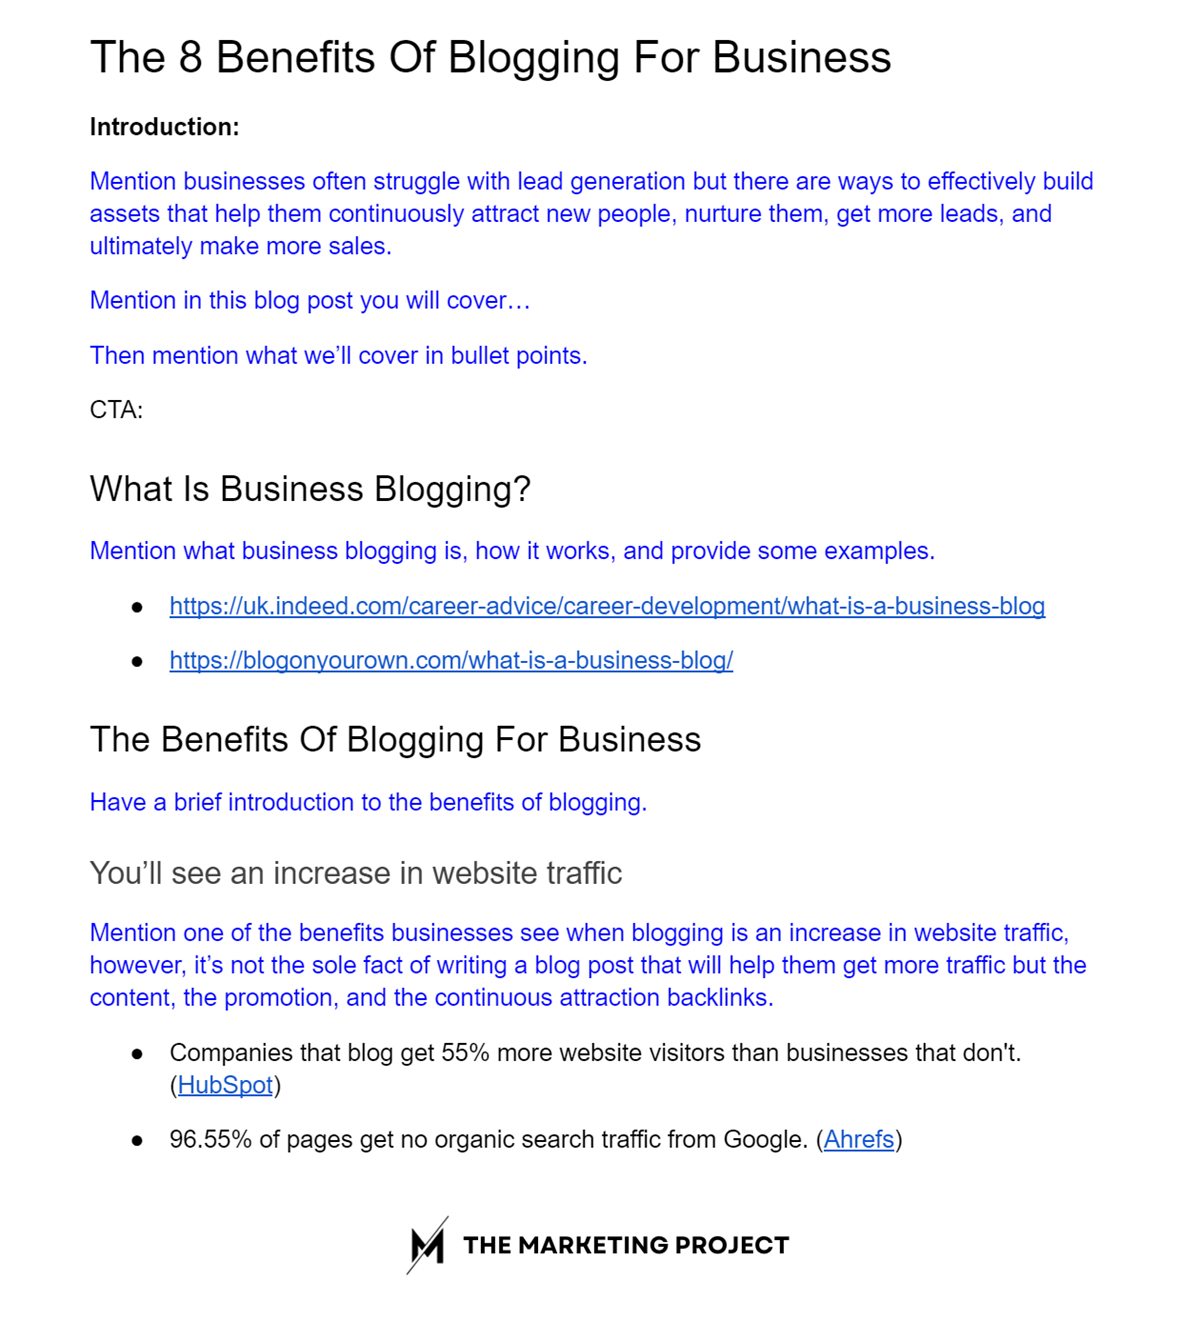
What a blog outline looks like when you add resources, data points, sources, and comments on how to tackle the blog post.
Alright, the first thing we need to do is create a blog post outline. A blog post outline essentially works as a guide that aims to help us focus on the right information so we can create better content faster.
For this example, I’ll focus on the keyword “benefits of blogging for business”. We already published the blog post we created with this tutorial so you can open it on a new window and read it after you are done with this one.
Also, every time you create a new blog post, think about the purpose of that piece of content. This is very important because it will inform the outline you create, how you tackle the topic, and the overall writing of the blog post.
So in my case, the purpose of the blog post we are creating is to promote our blog writing services.
Alright, with that out of the way, let’s get started.
Researching your blog post
The first thing you need to do is see what’s already ranking. This is so you know what type of content you have to create and what you need to include in your post.
So, head to Google and search for your main keyword. Then, open the first three top results in new tabs.

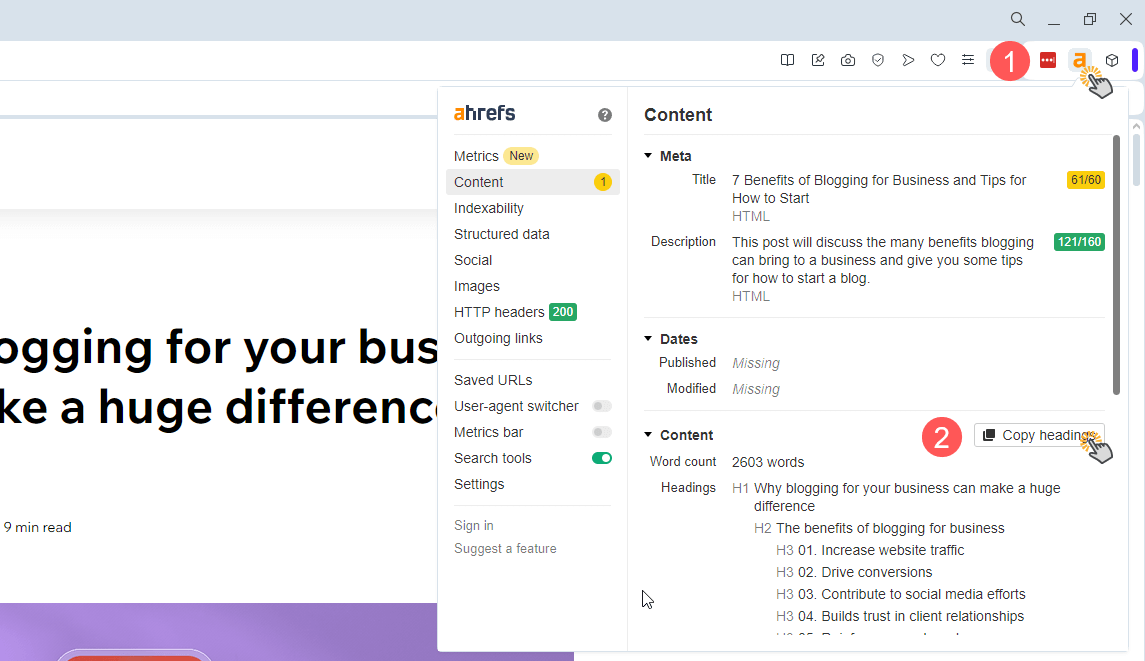
After that, you’ll have to copy all the headings into a new document or notepad. I recommend using Ahrefs’ SEO Toolbar to save time.
Once you install the extension, click the Ahrefs icon, then click “Copy headings”.
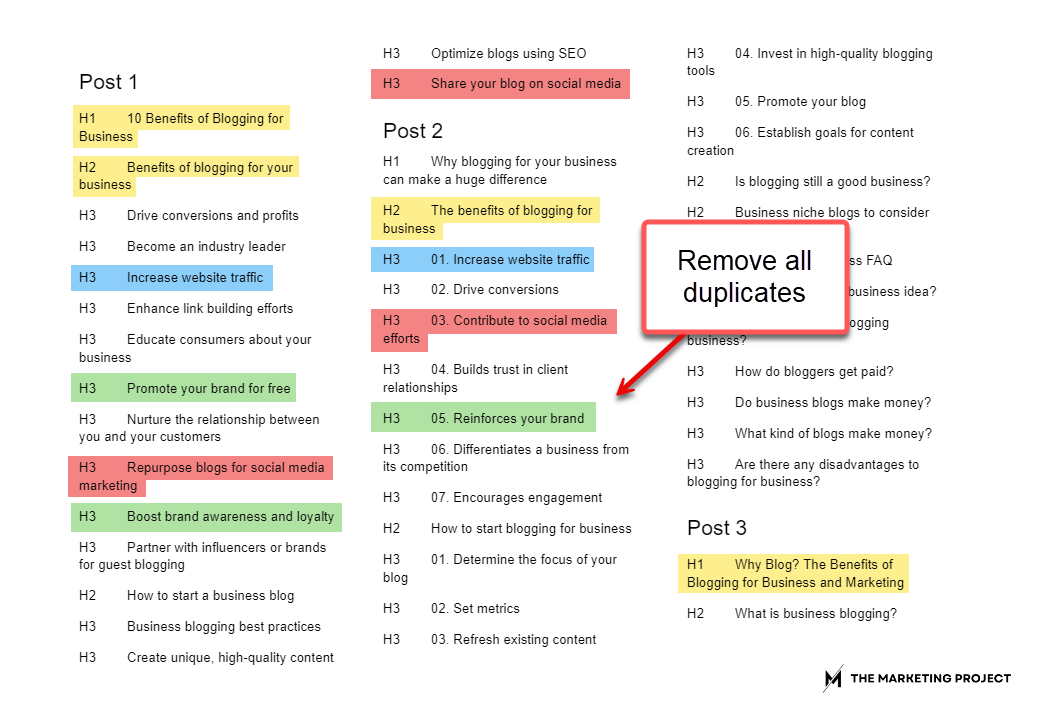
Once you have all the headings in a document, all you have to do is spot all the trends. Find all the topics that repeat themselves across all blog posts and remove duplicates. These are the topics you should ideally include in your post.
Next, add any other information you believe is important to cover. Think of examples you want to include, videos, and any other media that may help you improve the clarity of your post.
Research specific data and information
Okay, at this stage you will have the skeleton of your blog post. But you still don’t have the specific information you’ll cover in each section.
So that’s what we’ll do next.
Head to Google and research each section. Look for statistics, videos, blog posts, and anything else you need to write your blog post. These will be the sources you use to write your blog post.
After that, add instructions on how to tackle each section, the examples that should be provided, and everything you need.
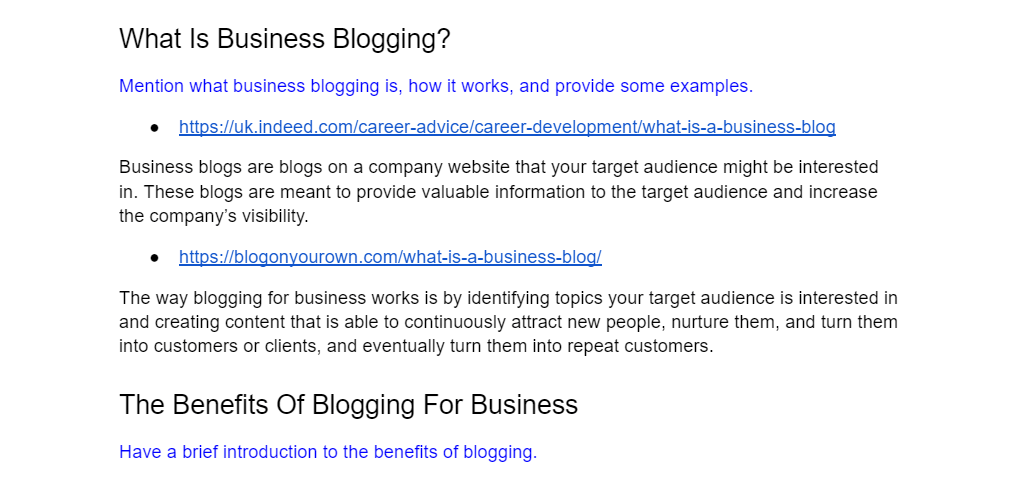
As soon as you are done with that, you’ll be able to start writing your blog post.
The difference between Rytr and ChatGPT
But before we do that, you need to understand how to use Rytr, and the difference between Rytr and other generative AI tools like ChatGPT.
ChatGPT is the type of generative AI that creates content based on a series of inputs. For example, you can tell ChatGPT to write a blog post introduction keeping in mind your target audience, and the angle you want it to take.

That’s something you can’t do with Rytr, or at the very least, not in the same way.
Rytr is the type of generative AI that takes an input and expands on it. In other words, you need to provide Rytr with the context of the content you want to create so Rytr can then expand upon it. So, Rytr basically acts more like a writing assistant.
With that in mind, here’s how to write your blog post with Rytr.
Do you have a Rytr account?
If you don't, create a free Rytr account to quickly and easily generate blog and social media content.
Drafting your blog post
There are three main sections you have to create, the first one is the introduction, the second is the main content, and the third is the conclusion.
Writing your blog introduction
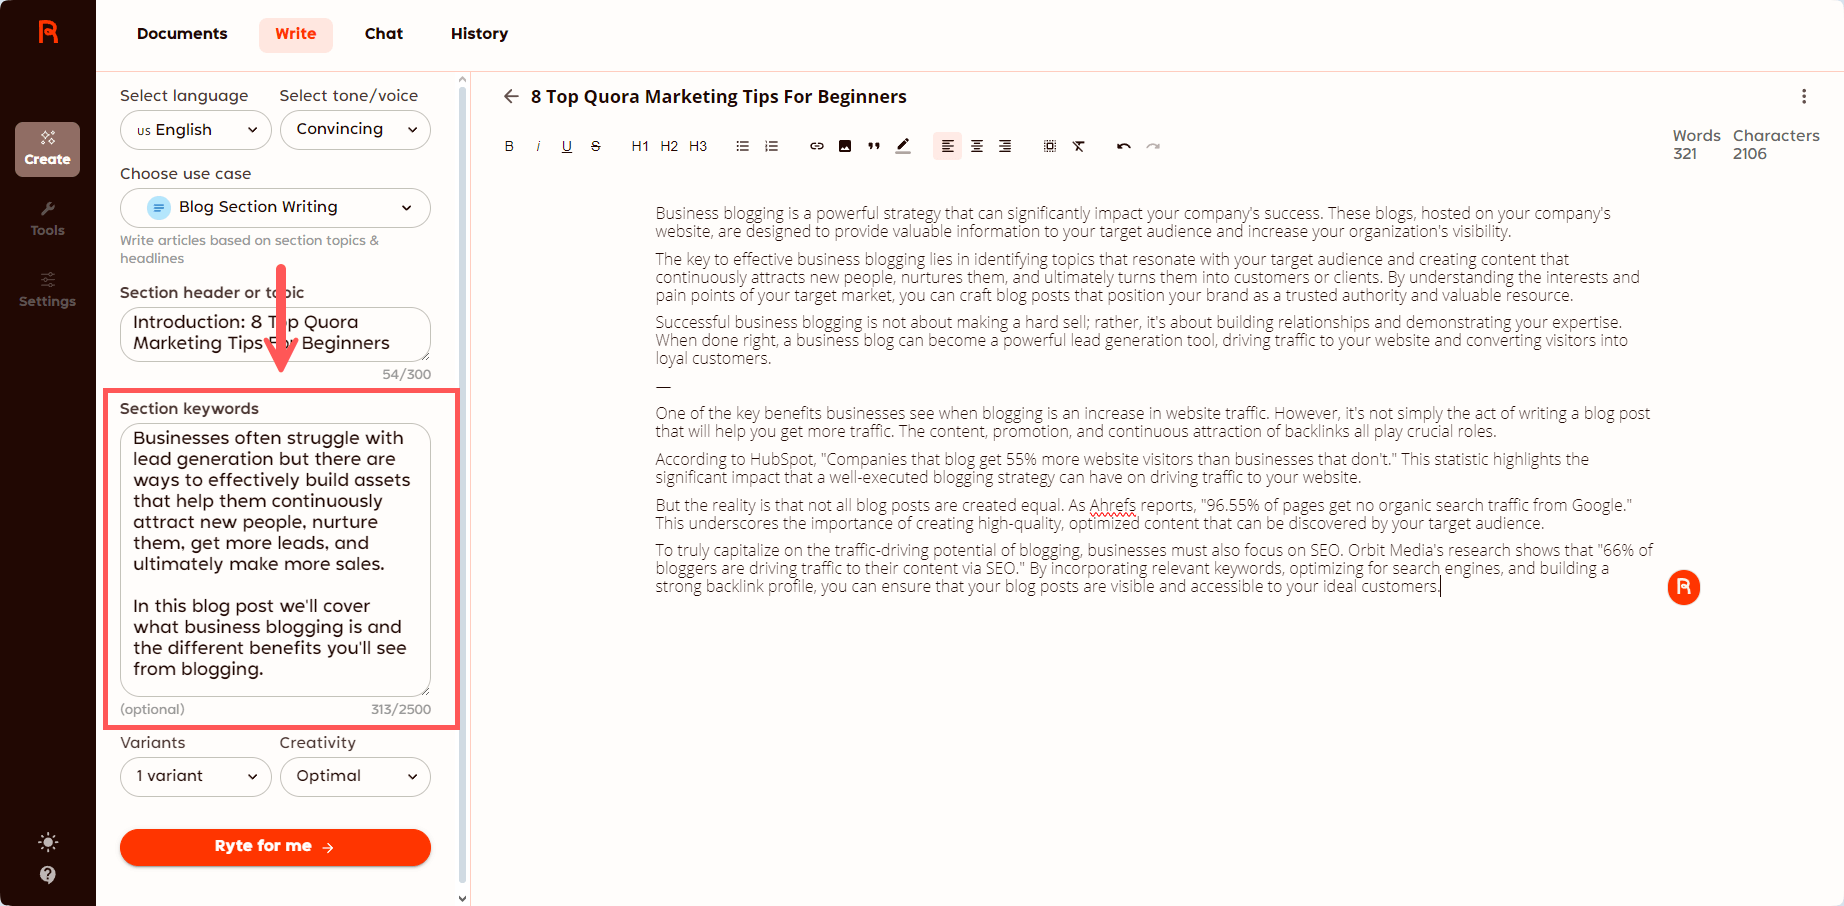
Start by selecting “blog section writing” on the use case. Then type “introduction: + the title of your blog post” on the “Section header or topic” section.

Next, we need to add all the section keywords. Section keywords are the context you’ll give Rytr to be able to write your introduction.
I recommend typing sentences you would use in your introduction so Rytr can then organize them and expand upon them a bit.
For example, I’ll use “businesses often struggle with lead generation but there are ways to effectively build assets that help them continuously attract new people, nurture them, get more leads, and ultimately make more sales” then I’ll add a comma (,) to separate ideas and I’ll continue, “in this blog post we will share with you eight benefits you’ll see once you start blogging for business”.
You can also use a break instead of a comma (,) to get different results. Try both to see which output works best for you.
When you are done writing your input, select the number of variants and the creativity level Rytr should use. The number of variants is how many variations of the same text Rytr will create and the creativity level is the freedom of accuracy Rytr will have to generate your content.
I always choose 1 variation and creativity level “optimal”. This is so Rytr always sticks to the facts and doesn't go on inventing stuff I don’t want in my blog posts.
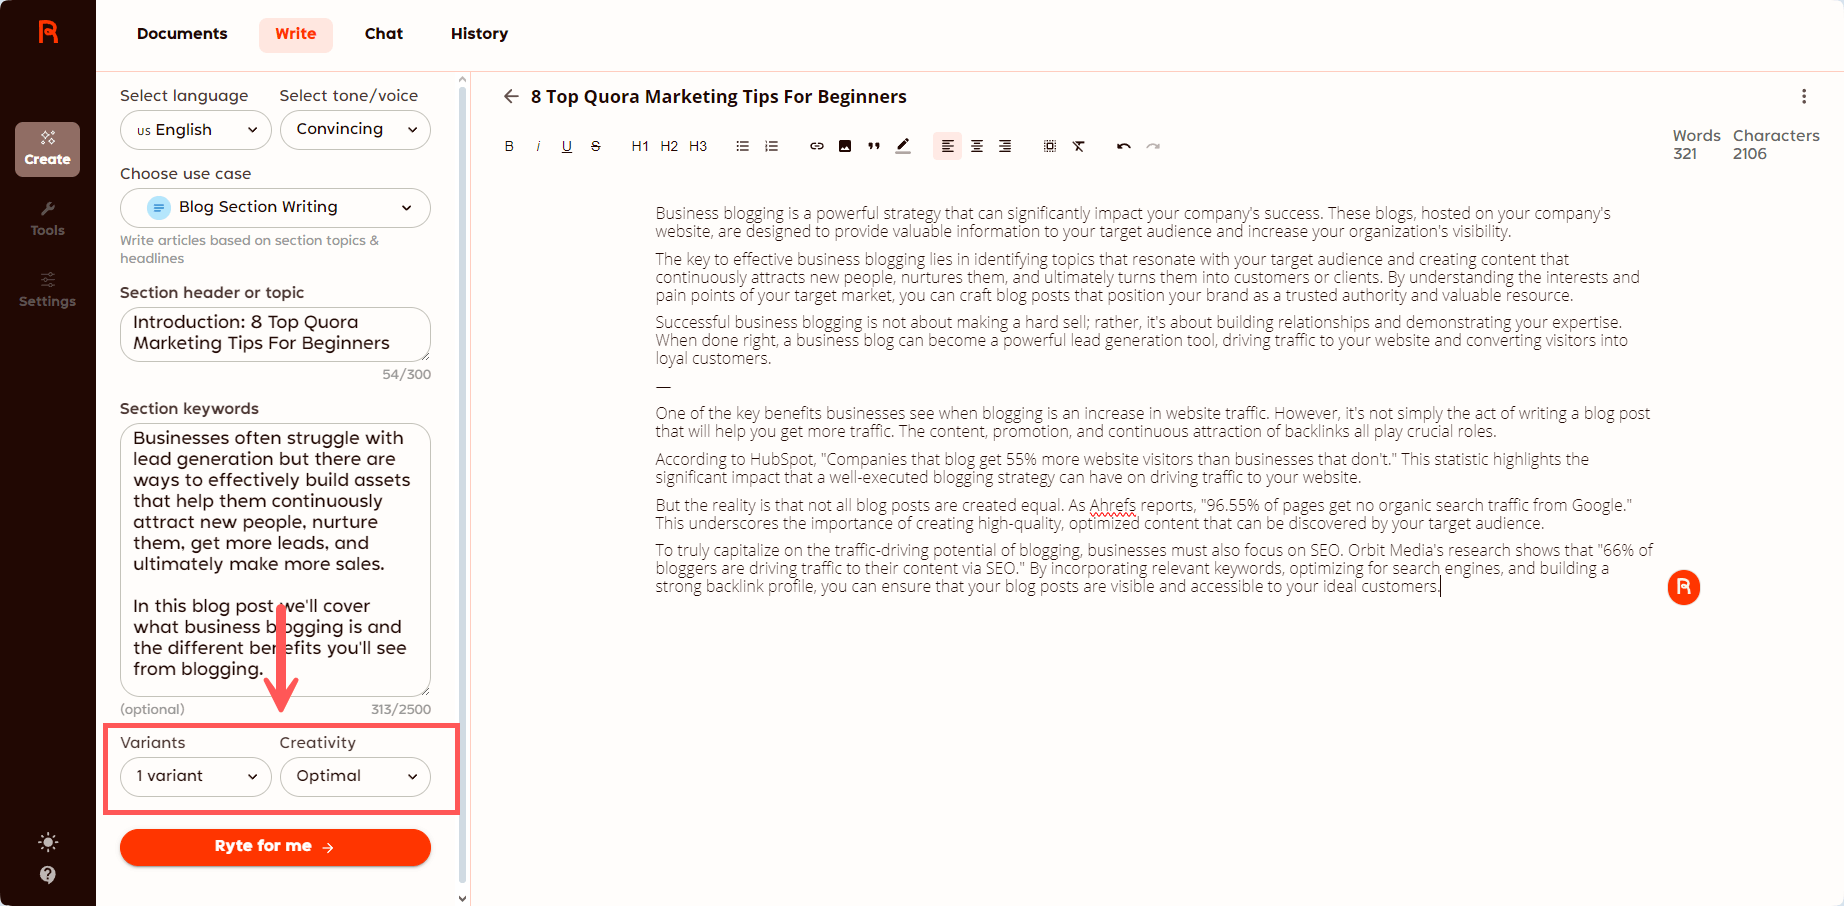
And lastly, click, “Ryte for me”. Rytr will then take your input and generate your introduction.
Review your introduction
At this point it’s just a matter of reviewing the content generated and editing it to make sure it’s something you would feel happy publishing on your site.
Sometimes you don’t have to make any changes, other times you’ll have to edit it a little bit. It’s up to you.
Create your main content
All you have to do is remove “introduction” from the section header and the title of the blog post.
This time, what you’ll want to do is type the name of the section of the blog you are trying to create. In other words, the heading.
Something I have to mention is that the longer and more descriptive the heading, the better the output. So take the time to write nice, descriptive headings.
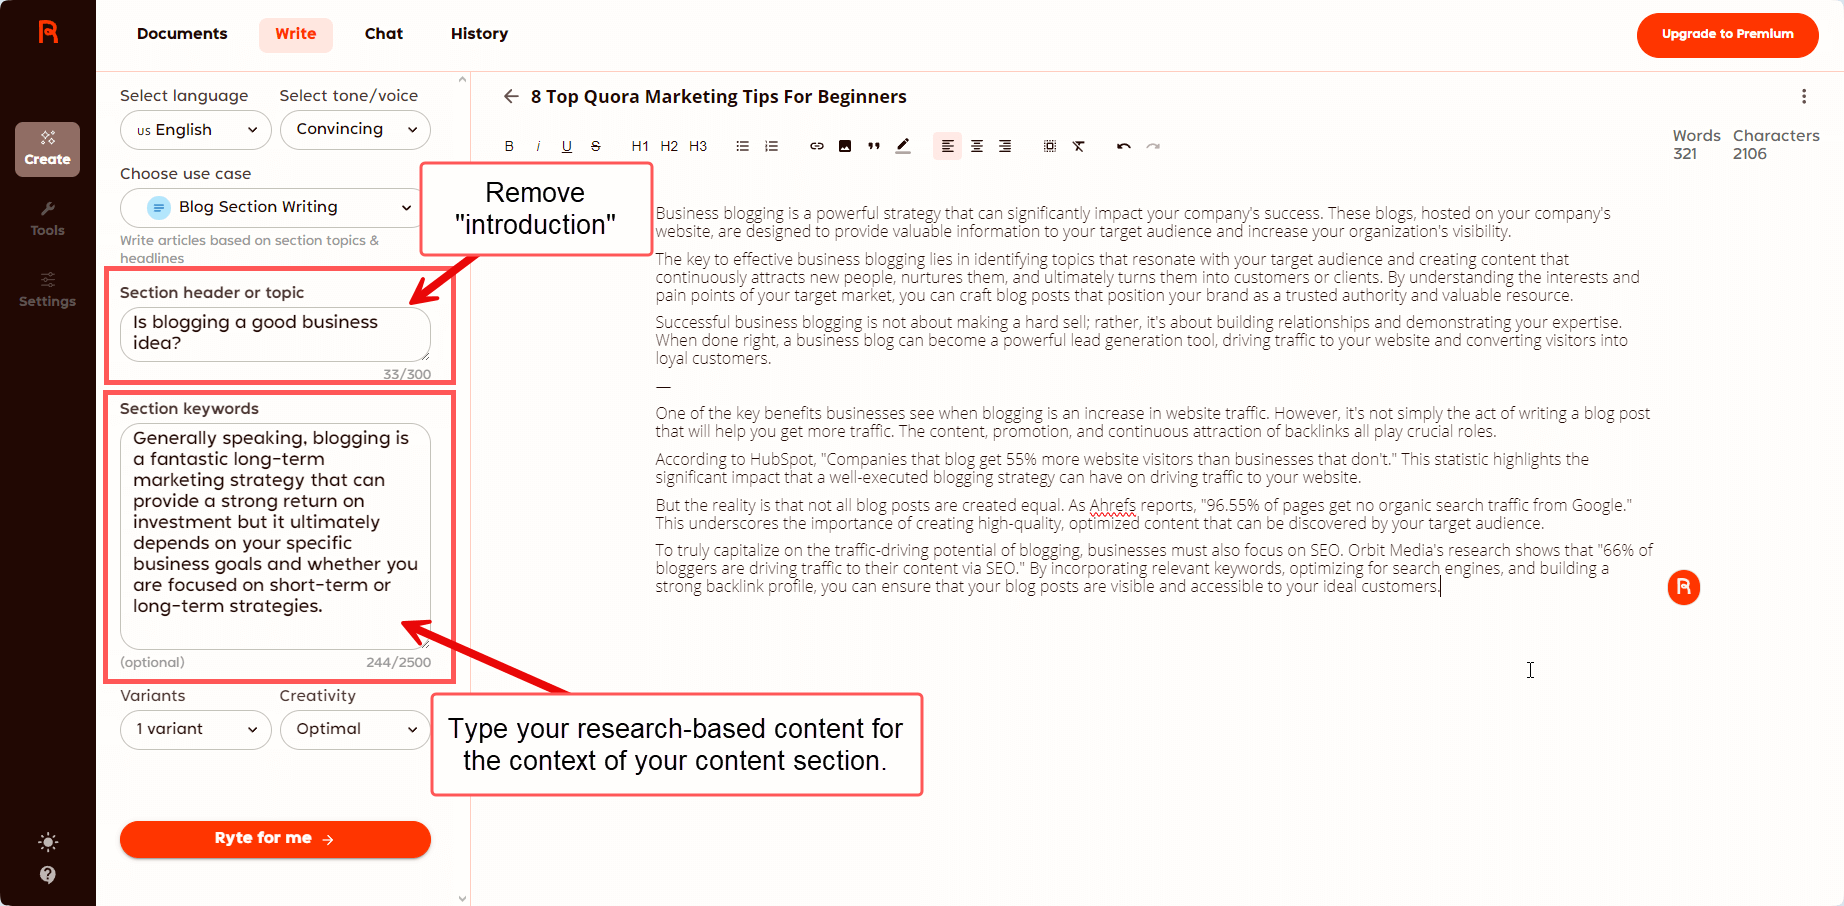
Then, in the section keywords, add the context for the content you’ll generate. This is where all your research comes in and will help you create great copy.
So let me show you two examples. The first example is when you are trying to come up with definitions and explaining how things work. And the second example is when you have data to work with.
Generating definitions and explanations
Generating definitions is rather simple, all you have to do is type the question you want to answer in the “Section Header”. And then add a part of the definition and other information you want to see in the “Section keywords”.

Lastly, select the number of variations you want and the creativity level you want Rytr to have.
Next, click “Ryte for me” to generate your definition.
Generating data driven content
To generate data driven content, enter the name of the blog section you want to create in the “Section header or topic”. Then enter the context for the content that you want to generate and add quotes from the data you gathered.
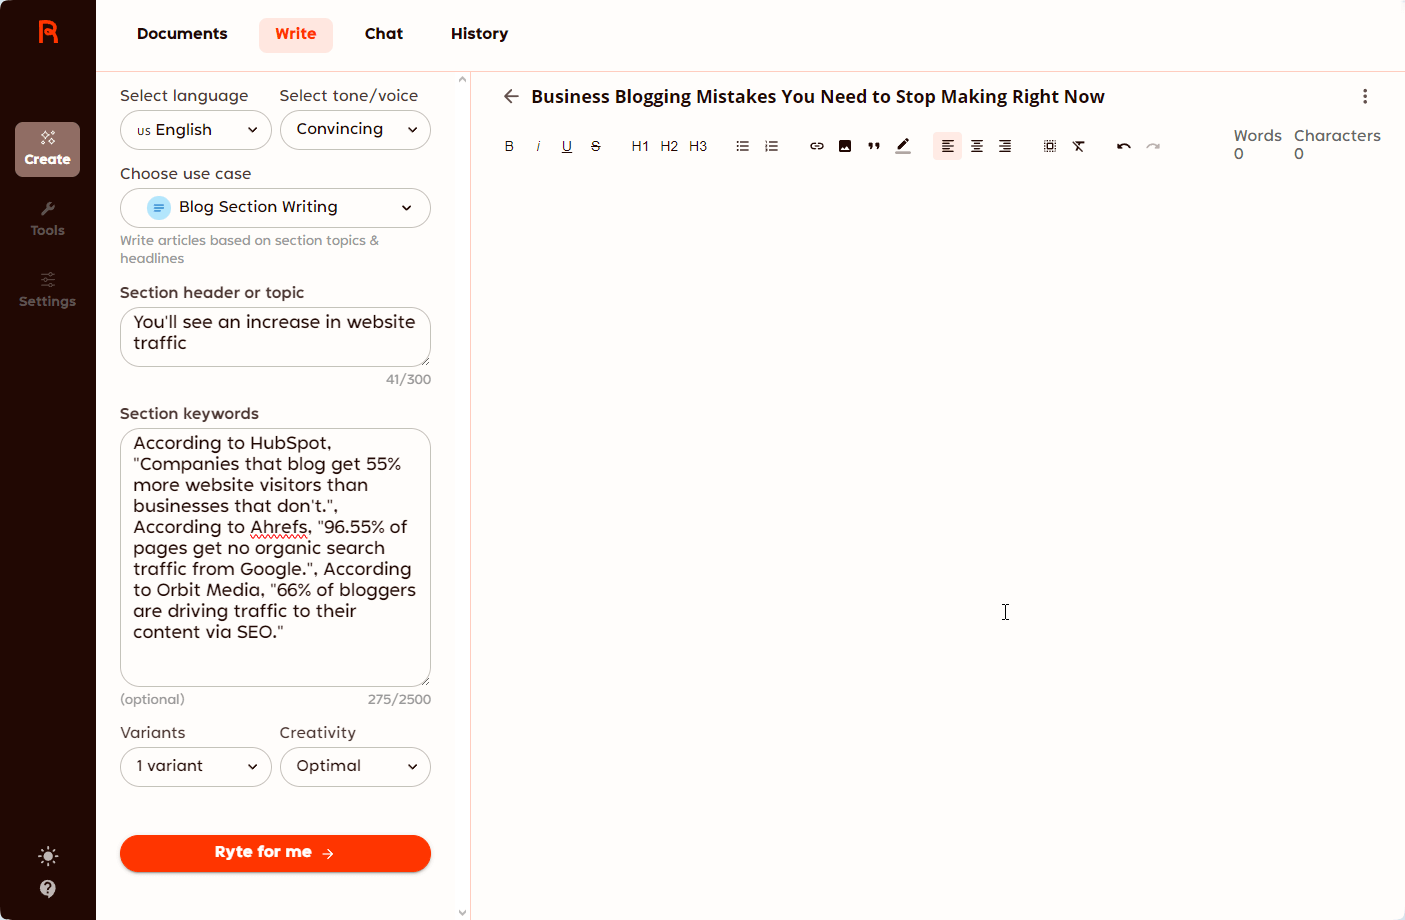
Lastly, select the number of variations you want and the creativity level you want Rytr to have.
Next, click “Ryte for me” to generate your definition.
Write your conclusion
Once you finish creating your main content, all you have to do is create your conclusion. To do that, type “Conclusion: + the title of your blog post” on the Section header or topic.
And then add the context just like you did on your introduction and the main content. I recommend typing a little bit of the key takeaways people should have and other important information.
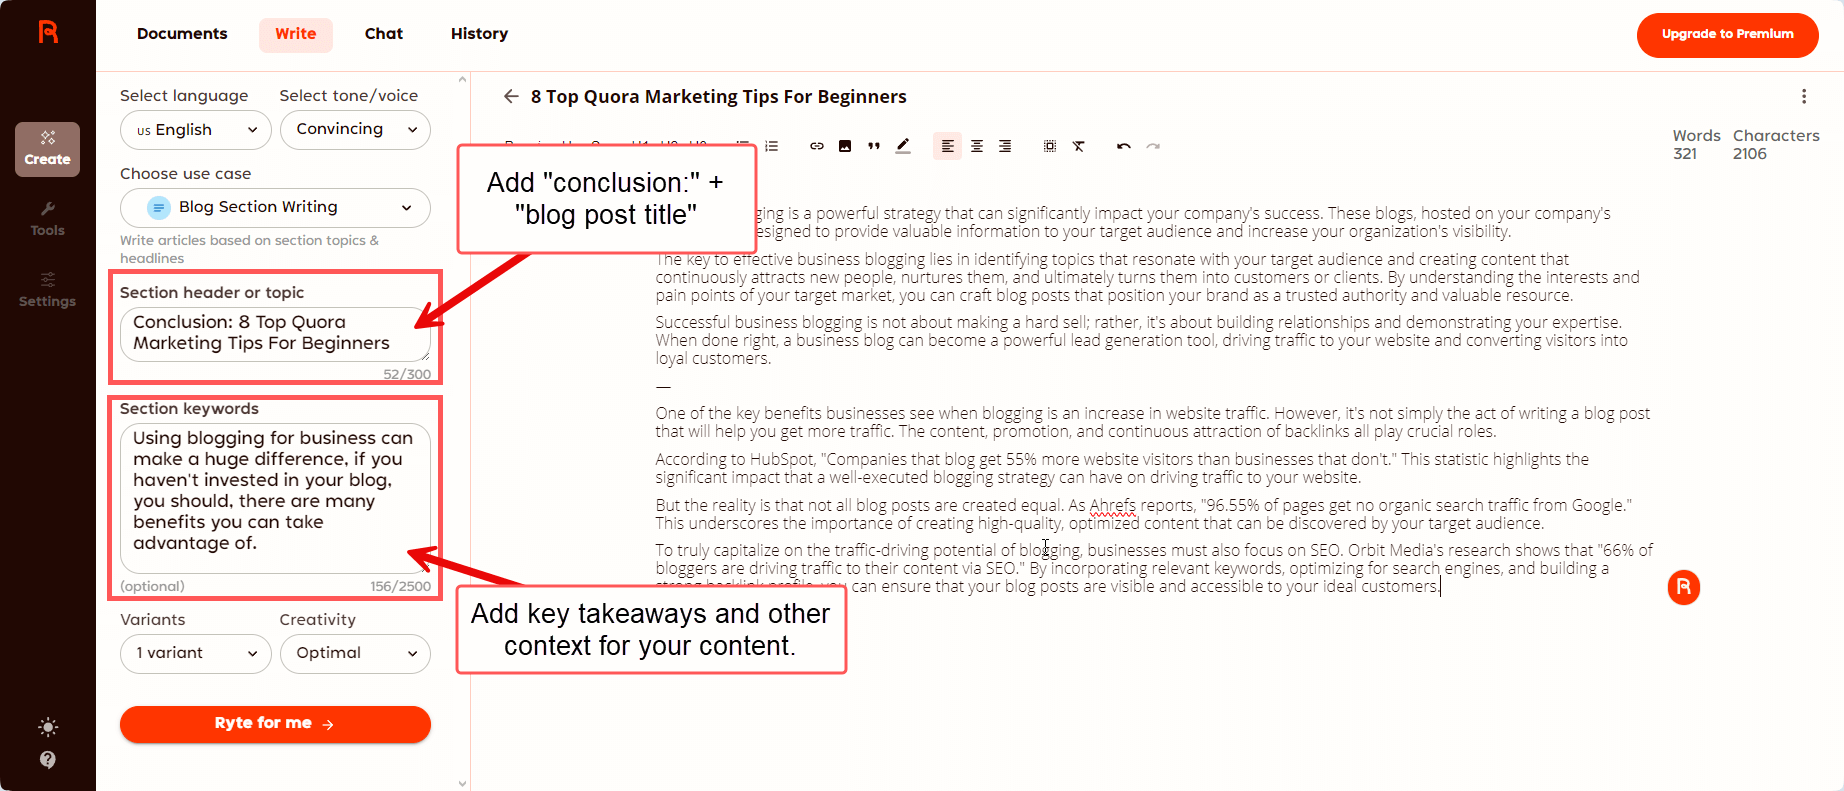
Then click, “Ryte for me” to generate your content.
Review your blog post
At this stage you’ll have all the content you need for your blog post so what you need to do is review all the generated content.
Read everything and remove content that doesn’t make much sense so the reading flows properly, add examples to expand on the content and make it more in depth, reorder content if necessary, and add media to make it easier to read and understand.
Once you finish reviewing your content, I recommend sending it to your content editor. At this stage you are too close to spot issues you normally would. When we spend a lot of time on one task, we basically become tunnel visioned and we can’t see some mistakes like grammar errors and simpler ways to say things.
If you don’t have a content editor on your team, or you work alone, then take a break.
Just stop what you are doing and leave it for tomorrow or a couple of days, and then come back to review your post. That way you’ll see things with fresh eyes and you’ll be able to come up with ideas to improve your content.
Publish your content
Lastly, publish your content. You’ve worked hard to create your content and make it the best it can be, so grab a beer and celebrate with the team. Then go back and do it all over again.
My final thoughts
Creating blog posts isn’t necessarily complicated but writing great content requires a lot of research and preparation before you even begin writing. So, if there’s one key thing you took away from this blog post, it should be that. It’s essential to do proper research.
