Have you ever struggled to come up with fresh blog content consistently?
If so, you’re not alone! Every content creator struggles with coming up with new topics for their blog posts. But what if I told you that you don’t have to stress about it? Does that sound good to you?
Well, the good news is that if you already have YouTube videos, you can easily turn them into engaging blog posts pretty effortlessly.
So, in this blog post, I’ll walk you through the exact process we follow for repurposing all our YouTube videos into compelling blog content.
More...
1) Create a Descript account
Alright, the first thing you need to do is create a Descript account. Descript is video editing software that allows you to edit videos through text. Actually, it does much more than that, but we’ll keep it simple for now.
Once you’ve created your free account, head over to YouTube and choose the video you want to repurpose. Then, copy the video link to your clipboard.
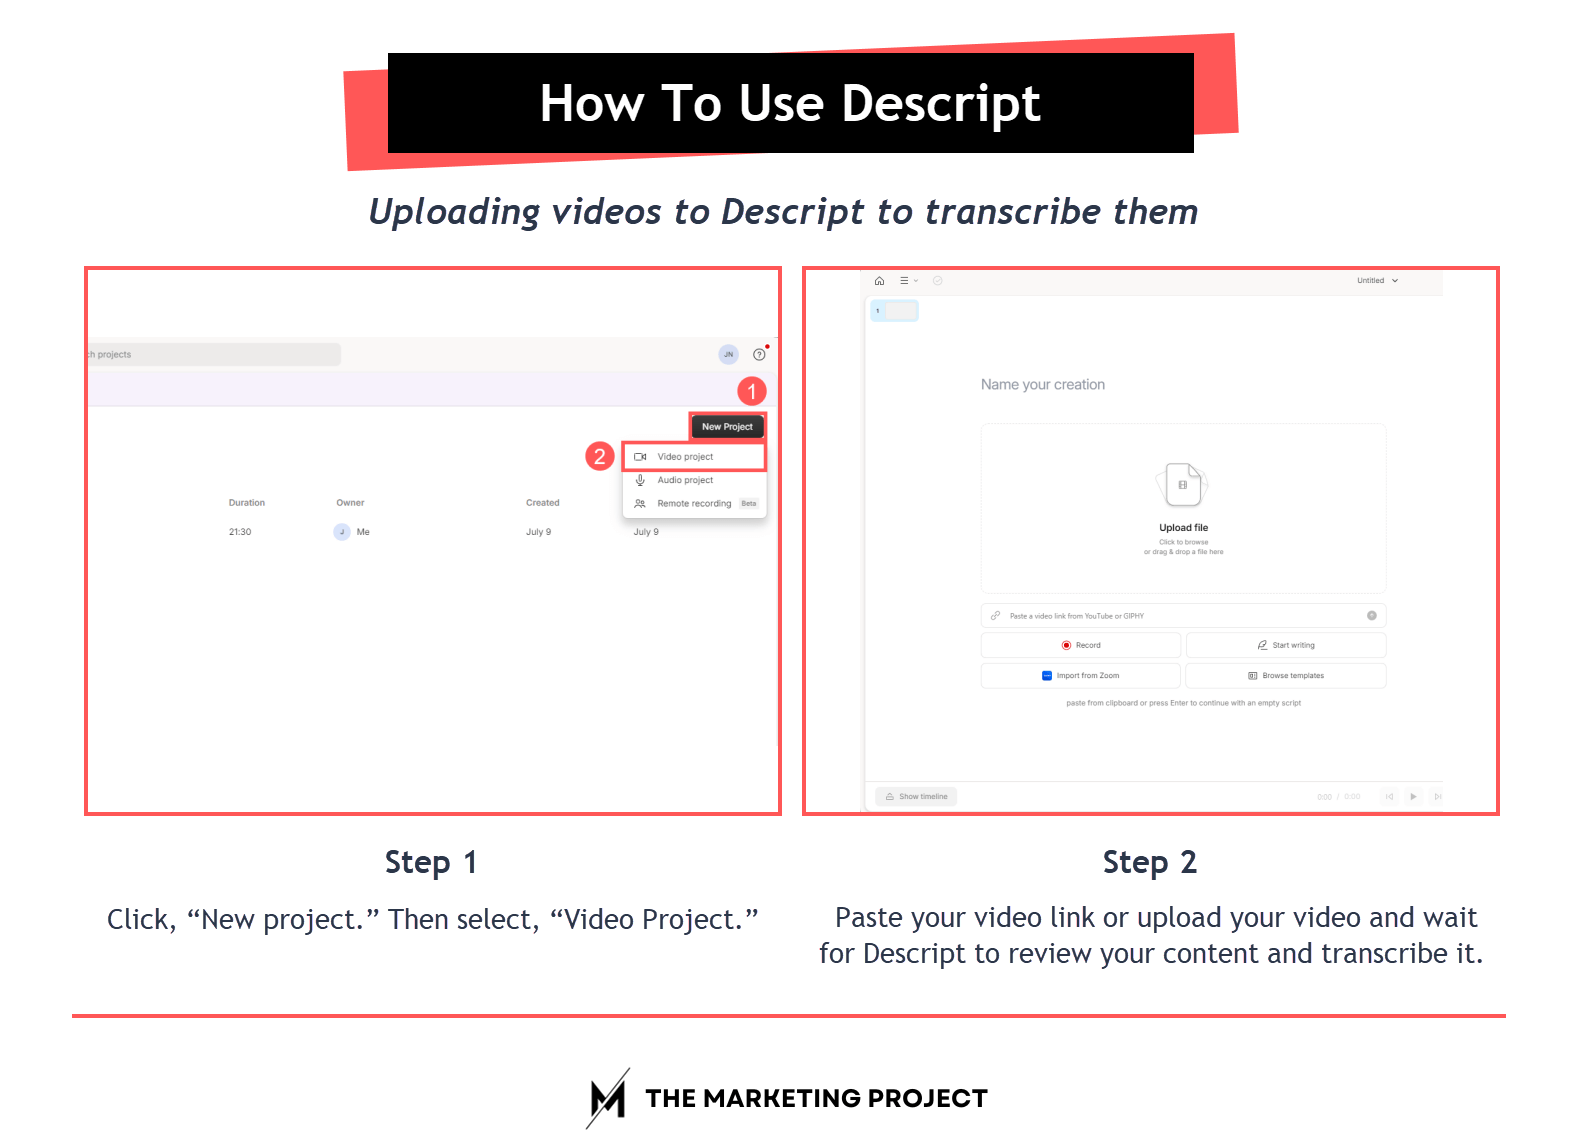
Process you need to follow to have Descript transcribe your videos
Next, head to Descript and click “New project.” Then, select “Video Project.”
That will take you to the main Descript video dashboard. Paste your video link and wait for Descript to review your content and transcribe it. The time it takes will depend on the length of your video, so just give it a moment to finish.
After that, you’ll need to edit your content to make sure the transcription is 100% accurate. Now, let me show you how it works.
Do you need help repurposing your content?

At The Marketing Project we help entrepreneurs and SMBs repurpose their content so they have more time to do the things only they can do.
The Marketing Project is a digital marketing agency that specializes in Q&A marketing. So, if you are interested in repurposing your blog posts, videos and podcasts, check us out.
We repurpose your content into blog posts, email newsletters, and social media posts.
If you are interested, visit our content repurposing service page.
2) Editing your content on Descript
Your dashboard has two main areas you need to focus on: 1) your script and 2) your controls.
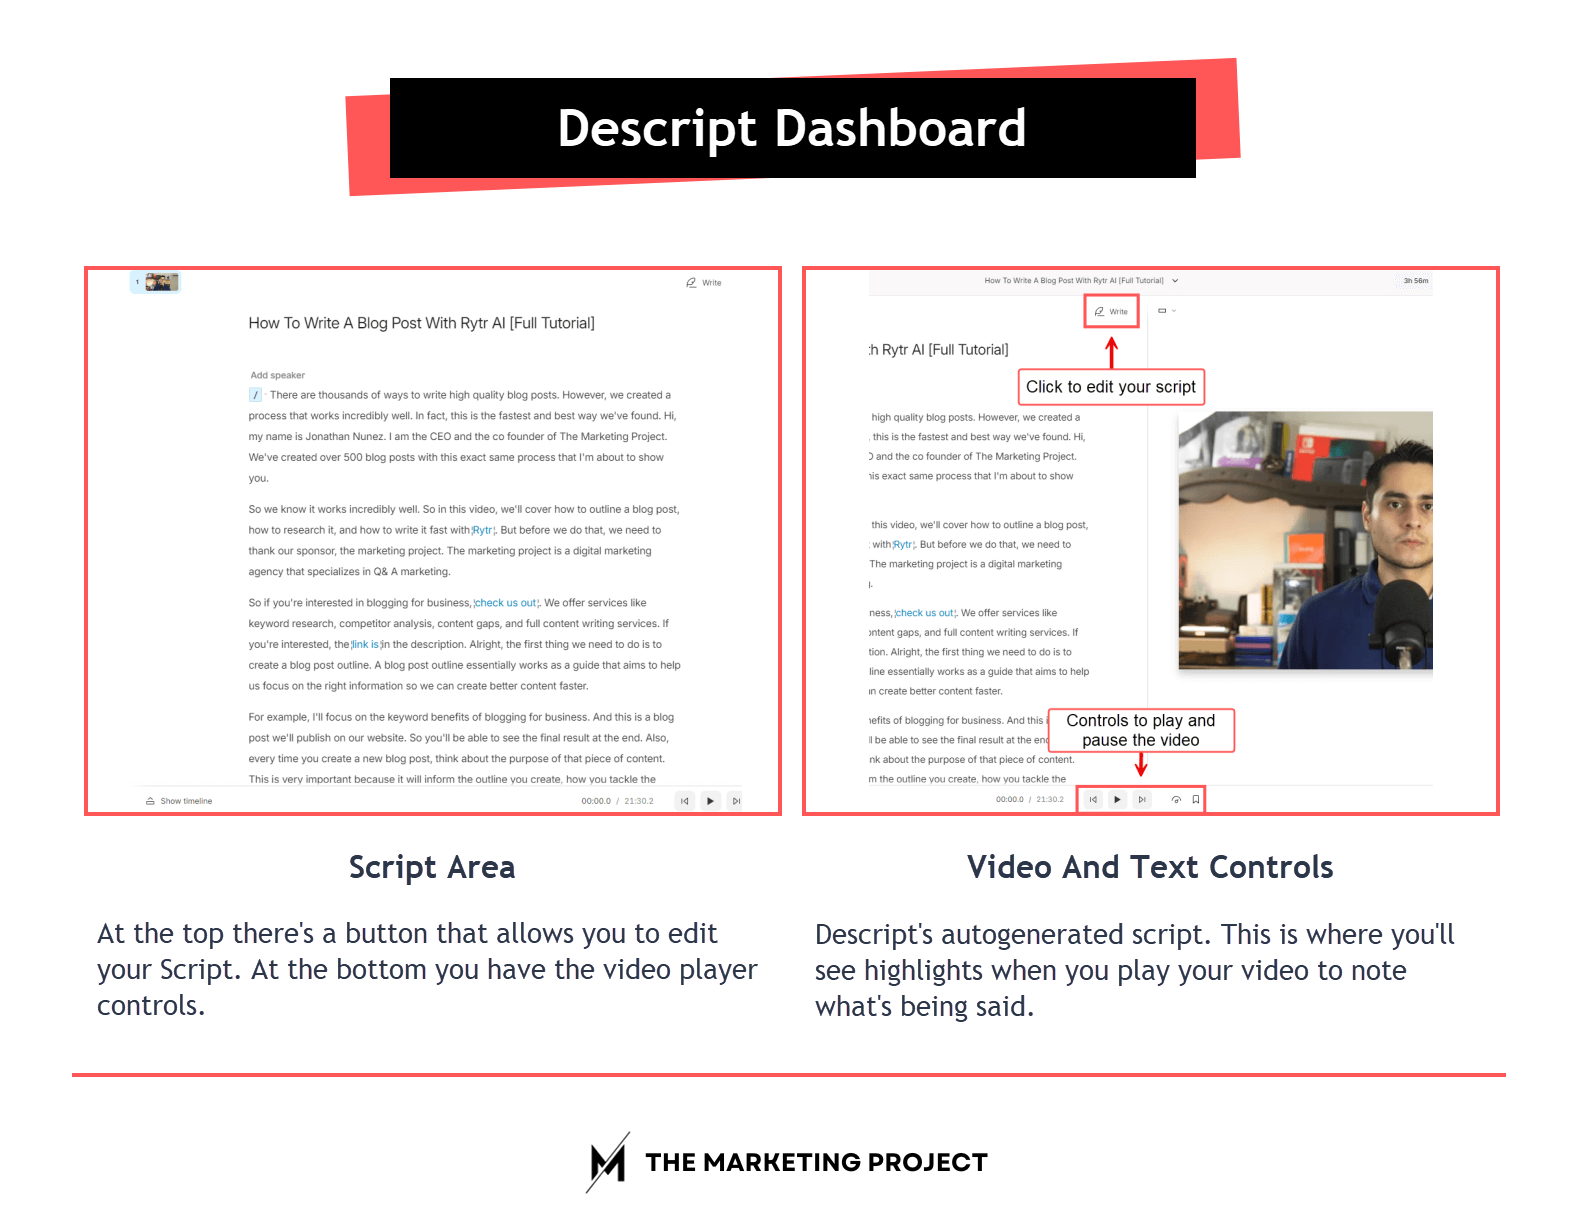
The two different areas you need to pay attention to in the Descript dashboard; your script are and your video and text controls.
Your script is what Descript transcribes based on what you say, but it’s not always perfect. Many things influence how accurate the transcription is, such as your tone of voice, accent, or if there are multiple speakers at once. That’s why it’s essential to double-check the transcription to ensure accuracy.
To start editing, click “Write” to enter editing mode (refer to the image above for a visual guide). Then, click “Play” to watch your video and see if the transcription matches what’s being said.
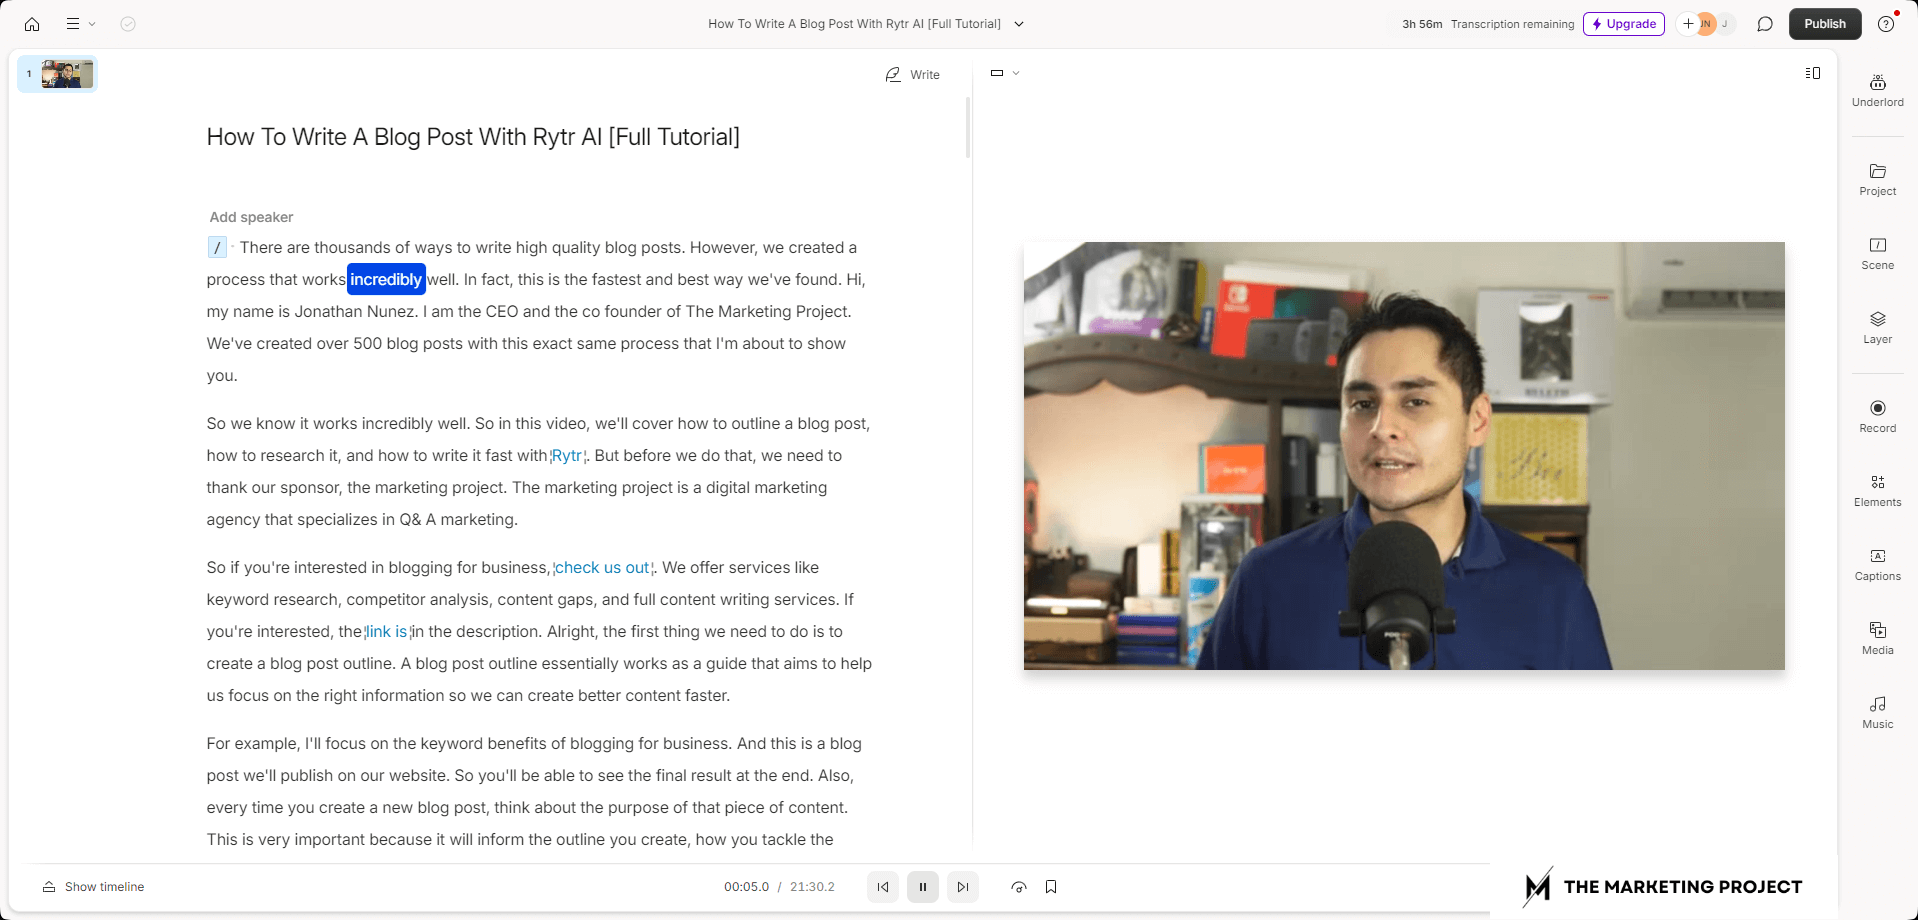
How Descript highlights texts when it plays a video to show what's being said.
As your video plays, Descript will highlight the parts of your video that are being said in the script. If you spot a mistake, click “Pause” and select the section in the script where the error occurred. You can then make corrections just like you would in any text editor, like Word or Google Docs.
Continue this process until you’ve reviewed and corrected the entire script.
3) Edit your content to fit written form
The next step in the process is doing another round of editing to ensure the content works well in written form.
A lot of the time when we create videos, we often say things that don’t translate well to text. For example, you might say something like, “See how when you click the box, it shows you what’s wrong.”
Do you see the problem?
That works in a video because you’re showing people what you’re talking about, but it doesn’t make sense in written form. So, you need to spot all issues like that and remove them from your text or edit them so it makes sense.
For example, you could modify that part to say, “See in the image below how, when you click the box, it shows you what’s wrong.” and then you include an image.
That makes sense, so be sure to edit your content to fit the written form. Also, remove any unnecessary fluff. When we speak, we often get redundant or go off on tangents that aren’t needed, so make sure to cut those out.
4) Add blog sections (headings)
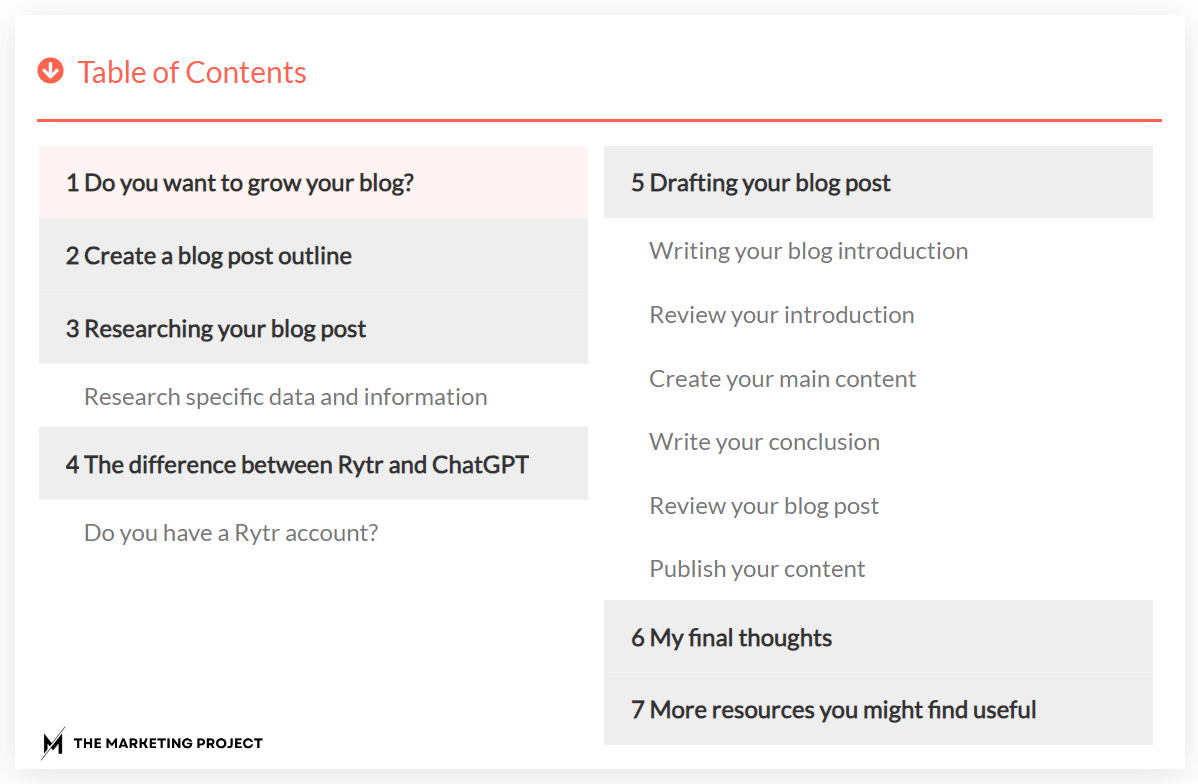
Table of contents showing all the blog sections found in one of our articles.
Headings are all the sections in your blog post that help readers easily navigate the content. So, make sure to add headings that clearly describe what each section is about.
If you aren’t completely sure what to call each section, you can use tools like ChatGPT to help you create them.
Just ask it to create a descriptive blog post heading based on the content you provide as context. ChatGPT will then do its thing and suggest a heading for that section. Repeat this process for all your sections until you’re satisfied.
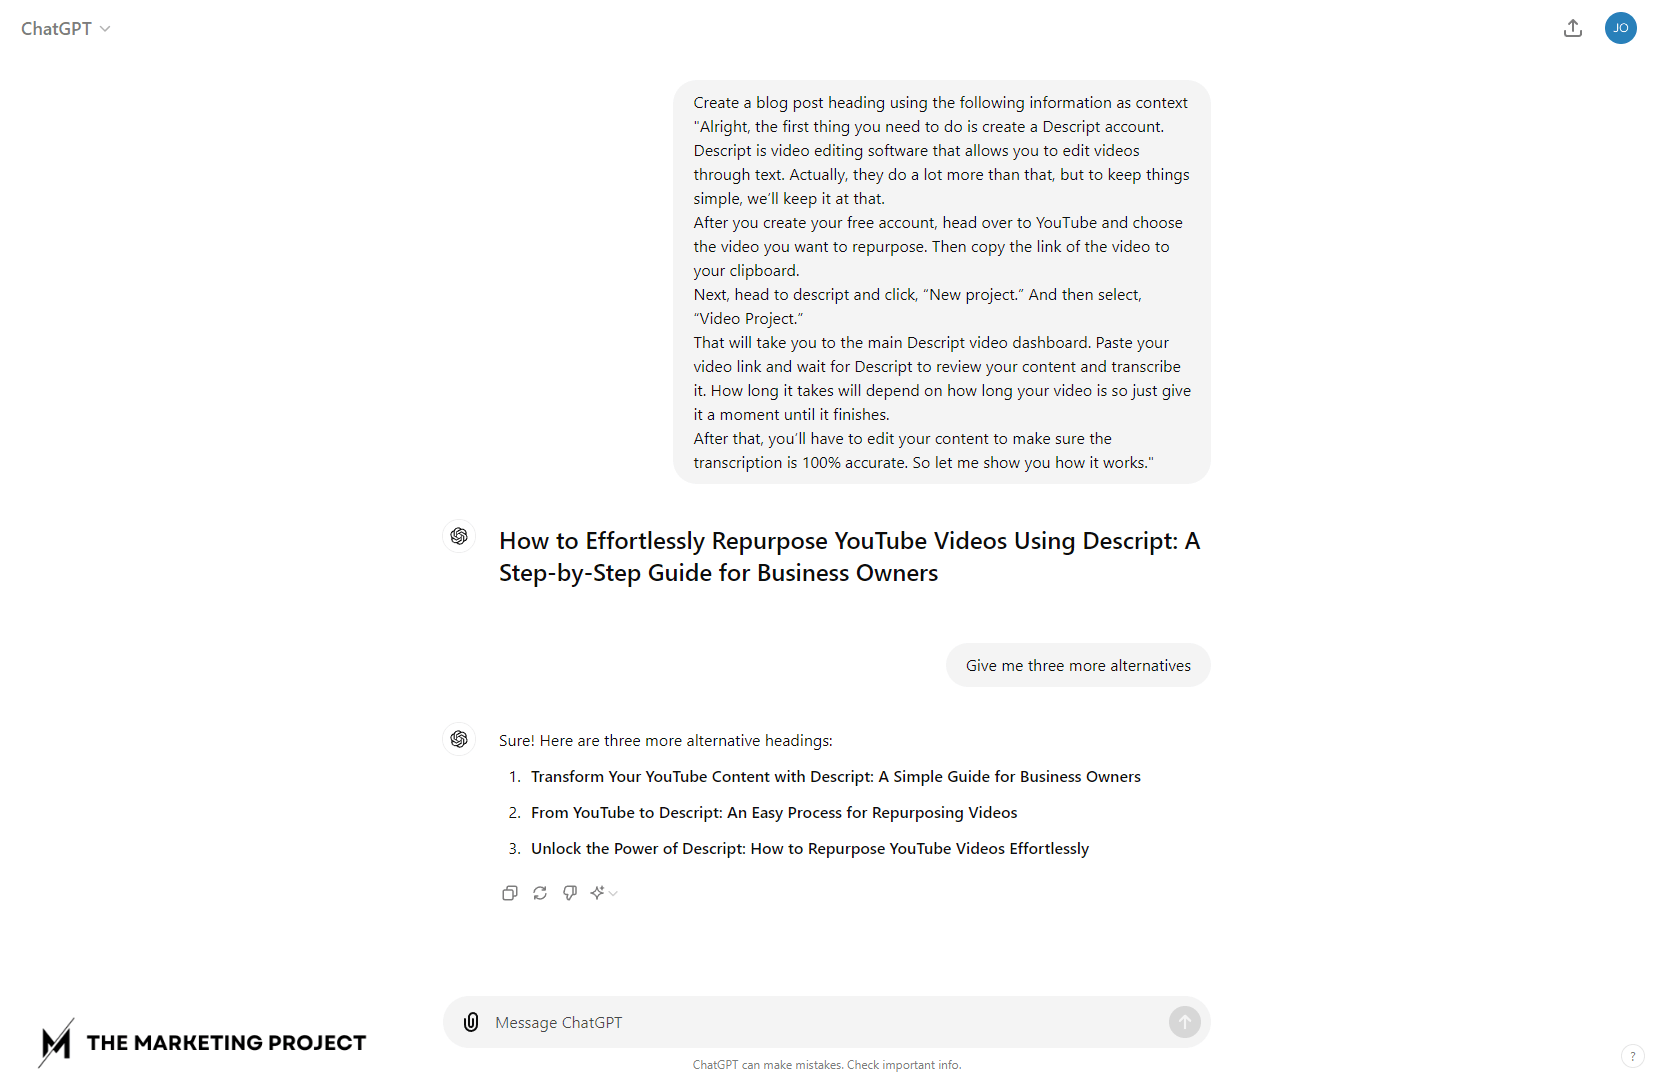
User asking ChatGPT to create blog post headings based on content provided.
5) Add media like videos and images
The next step is to add media like videos, images, and GIFs. Spot all the places where it makes sense to add media and include whatever you need.
For example, if you’re sharing a step-by-step process, you’ll probably want to include images to illustrate what you want people to do. This will make the entire process easier to follow and will improve the overall quality of your content.
6) Add links to your blog post
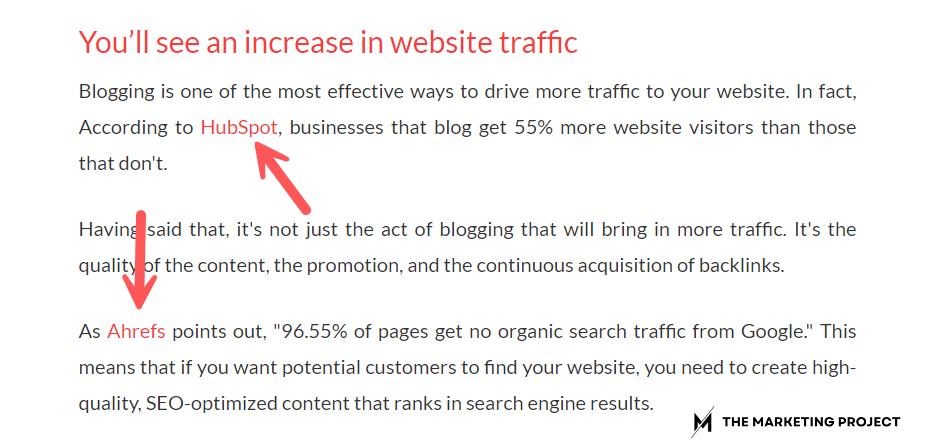
Examples of links pointing to data in blog posts.
After you’ve added media, it’s time to include internal and external links. Internal links are links that point people towards other pages on your website and external links are links that take people away from your website.
Some examples of external links are links that point people to studies and reports, guides, or other resources your readers might find useful.
Here’s a tip: when you add internal links, make sure you use UTMs to track clicks. If you don’t know how to create UTMs, use Google’s URL Campaign Builder. This tool will do it for you.
7) Do a final round of revisions
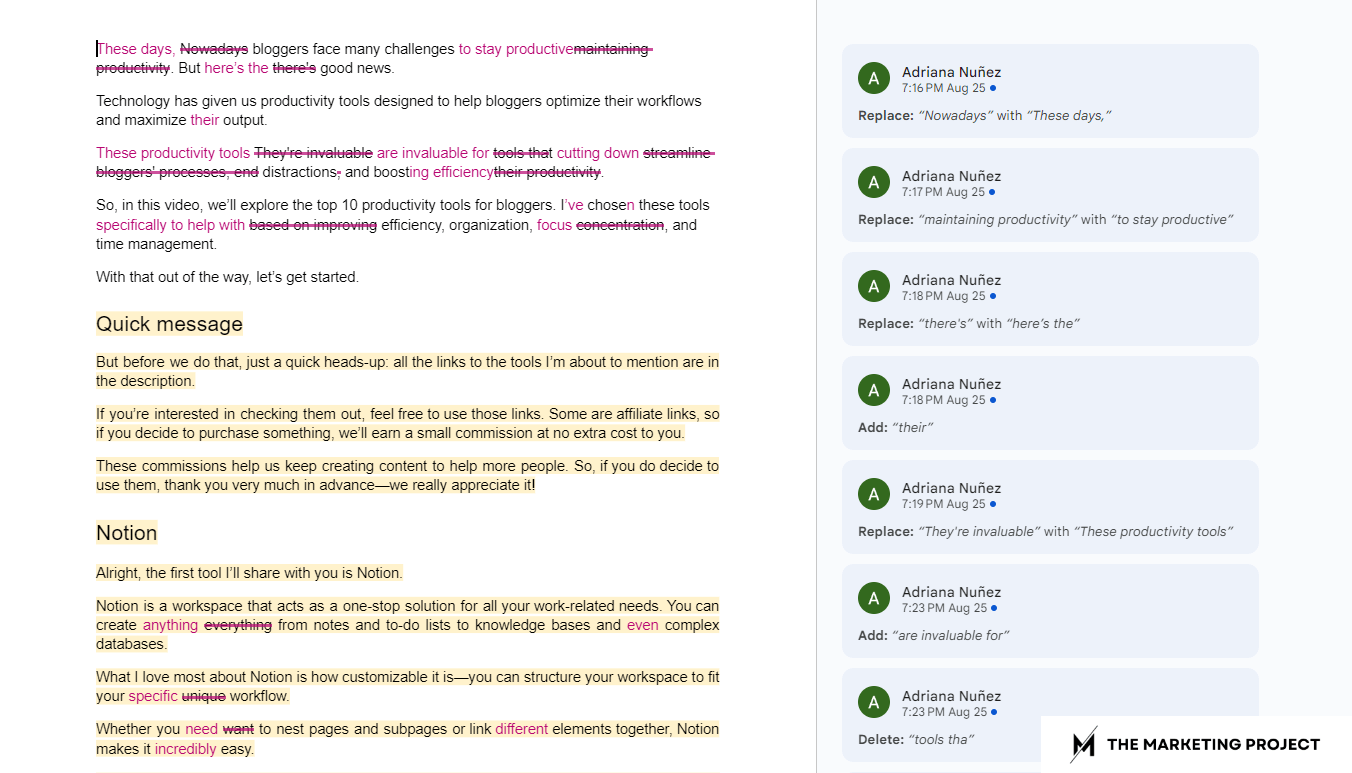
Revisions made to one of our blog posts on Google Doc.
Once you’ve finished adding links, it’s time to do a final round of revisions to make sure your content flows well and everything makes sense.
I suggest having a content editor review your work—they can offer a fresh perspective and help you make improvements.
If you’re working alone, make sure to take a break. Go to bed, relax, or go do something else. Then, come back the next day to do your final round of revisions.
This step is important because when we create content, we are simply too close to it and might miss grammatical errors or overlook simpler ways to express ideas.
So, take a break, then return with fresh eyes to polish your content.
8) Publish your content
The final step is to publish your content. You’ve worked hard repurposing your YouTube video, so take a moment to celebrate!
Once you’re done, pick the next YouTube video and start the process all over again.
My final thoughts
Repurposing YouTube videos into blog posts isn’t particularly hard, but creating great blog posts that are useful to readers and rank well in search engines takes time and experience.
So go ahead and repeat this process as many times as needed to develop the skills required to create amazing content.
If you need help creating blog posts from scratch, check our blogging guide. It will show you how to create blog posts quickly.
We also have a guide that walks you through the process we use for creating blog posts with Rytr, read it if you want to use AI to speed up content creation.
